How To Straighten Your Back (5 Best Posture Exercises!)
Struggling with forward rounded shoulders? Read this article. Here, I show you how to straighten your back with 5 simple - yet effective - exercises that you can easily combine into a 10-minute corrective routine.
More specifically, I'm going to show you how to straighten your back by covering the following:
- The causes of your hunchback posture
- Corrective exercises you could do
- A detailed 10-minute routine, along with instructions
By the end of this article, you should feel immediate relief. And you'll also have a 10-minute go-to routine to keep these improvements for life.
Looking for a training routine that won’t cause all sorts of problematic imbalances - and a hunchback posture? Then you’re in the right place. I’ve designed each and every program available on BWS to help develop your physique in an all-rounded way so you achieve your fitness goals safely – and in the most time-efficient way possible. If you’re interested, then:
Click the button below to take my analysis quiz to discover the best program for you:
↓
What Is Causing Your Hunchback Posture?
To understand how to straighten your back, we first need to cover where your hunchback posture came from.
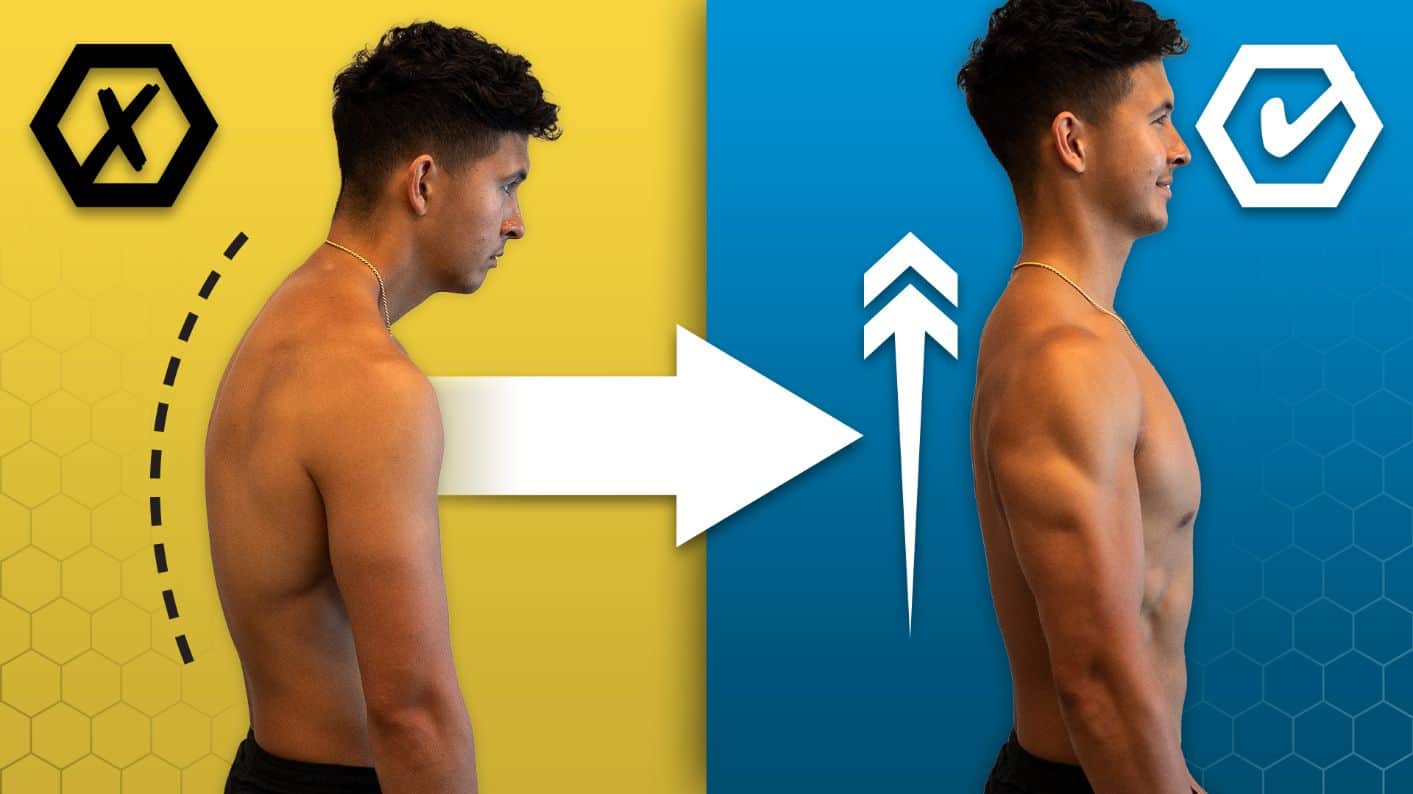
Here's the thing. Your body is an adaptation machine. In as little as 3 months of prolonged sitting and standing in a hunched-over position, your body will adapt to become more 'efficient' at being in that position all day.
Now, combine this with the fact that we tend to worsen the problem when we workout. We focus only on training the muscles we see in the mirror while neglecting the ones we can't (i.e. 'backside muscles'). This leads to a really tight front side that pulls our back forward. Plus, a really weak backside that can't straighten itself out.
To fix this, we'll use a method that's been proven effective in multiple papers.
A Peek Into Your 10-Minute Corrective Routine
And what's this method? Well, it's a 10-minute corrective routine that involves 2 parts:
- Part 1: Focus on mobility to loosen up the back. The first exercise will extend the back upright, the second will rotate the back, and the third exercise will teach your body how to move in its new upright position.
- Part 2: Focuses on activating and strengthening the weakened muscles in the back. This part helps you maintain the new, corrected posture for the long term.
Here's what your 10-minute corrective routine looks like.
Mobility:
Prayer’s Stretch: 2 sets of 10 reps
Quadruped Reach: 2 sets of 6 reps
Shoulder Dislocations: 1 set of 10 reps
Strengthening:
Pull Aparts: 2 sets of 10 reps
YWT’s: 3 sets of 6 reps
This routine works on its own when done consistently at least 2-3 times a week. Or even as a warm-up right before your upper body workouts. This is as long as you implement it while making an effort to get up and move frequently during the rest of the day.
How To Straighten Your Back Part 1: Mobility Exercises
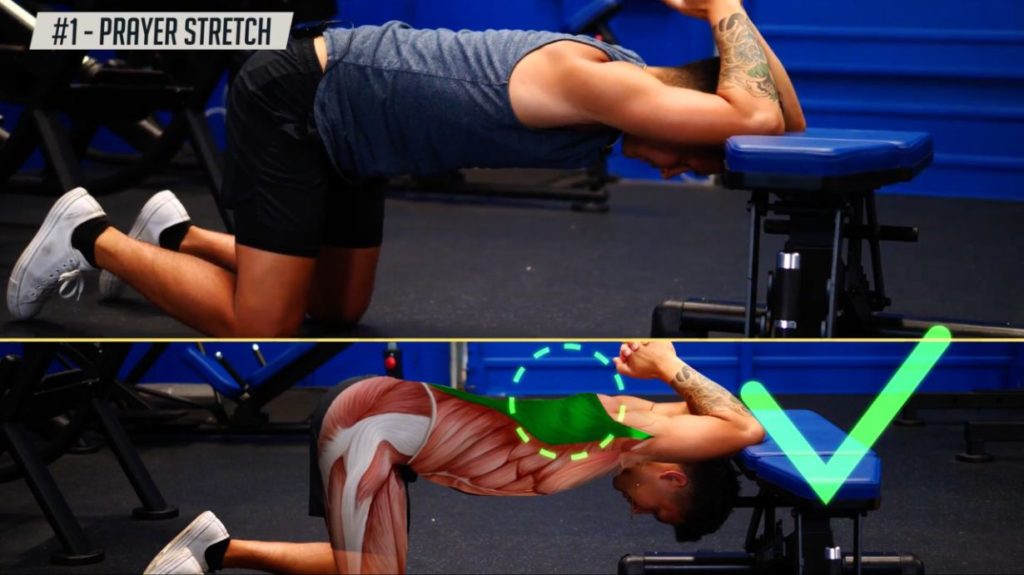
Exercise 1: Prayer Stretch
Let's dive into the first mobility exercise that'll help with your forward rounded shoulders. Here's how to straighten your back with the prayer stretch:
- Set up with your knees underneath your hips and elbows on a bench or couch.
- From there, place your hands together and take a deep breath in through the nose.
- As you exhale, drop your head towards the floor while moving your hands towards the back of your head.
- You should feel a deep stretch in your upper back and lats. Avoid cheating by bending the lower back instead of the upper back.
- Take another deep breath in the bottom position and then push your elbows through the bench as you bring your head back up to the starting position.
- Repeat for a total of 10 reps.
Exercise 2: Quadruped Reach
Now, we'll use a rotation exercise to loosen the back even more. Here's how you can do the quadruped reach:
- Grab a pillow or foam roller. Get on all fours with your knees under your hips and hands under your shoulders.
- Squeeze the pillow or foam roller between your legs. This will help prevent you from cheating.
- Place one hand behind your head and try to touch your elbow to the opposite wrist. Continue squeezing the pillow as you do so. You should feel a deep stretch in your mid-back.
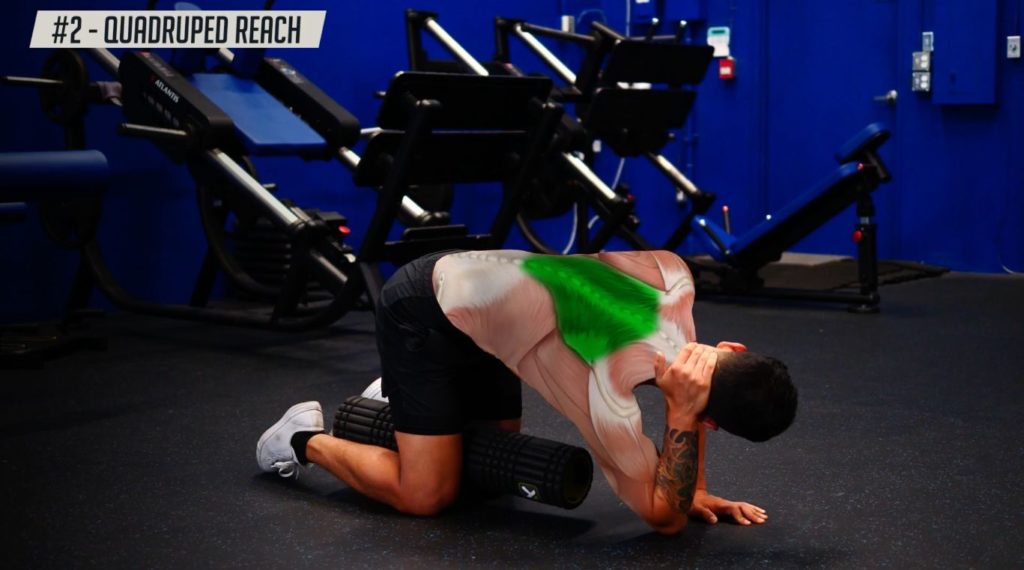
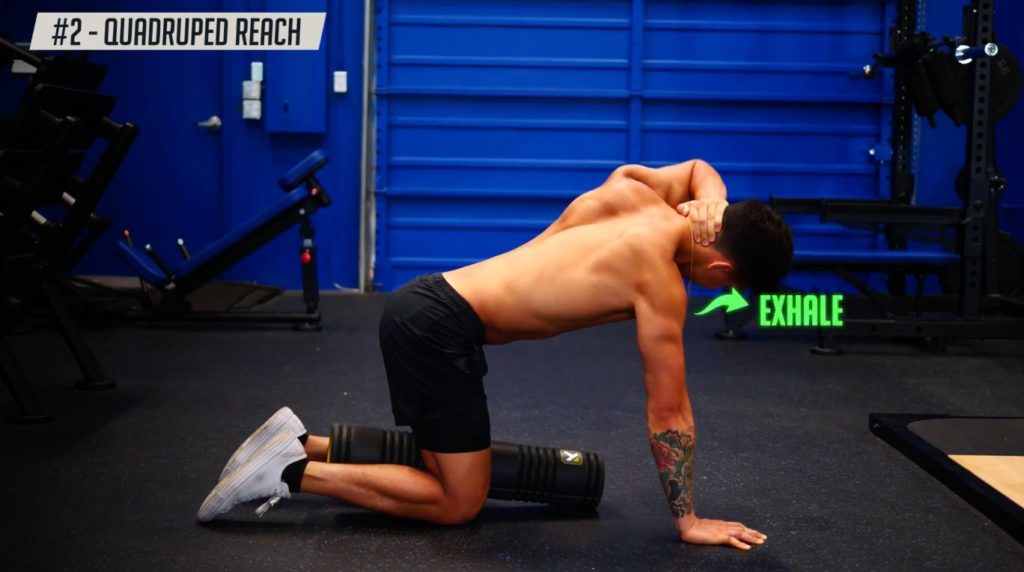
- From here, push away from the floor with your planted arm as you rotate your upper back to drive your elbow and head towards the ceiling. In this top position, you should feel your mid-back muscles working to open up your chest.
- Come back down to complete your first rep.
- Repeat for a total of 6 reps before switching sides.
Breathing throughout each rep is essential for fully opening up your upper back. so, make sure to inhale on the way down and exhale on the way up - rather than holding your breath.
Our upper back should now be in a better position thanks to the last 2 exercises. Now, we want to re-teach it how to stay and move, in this new upright posture.
Want To Fix Muscle Imbalances - And Transform Your Body?
By the way, guys, if you want to fix your muscle imbalances and posture, while at the same time lose unwanted fat and build lean muscle, our Built With Science programs will help you do just that. Within our programs, we've developed a system that uses science to transform your body into a lean and attractive one. It's worked for thousands of people all over the world. Take the following free quiz - it'll just ask you a few questions to determine which of our programs will best suit you and your fitness goals:
Click the button below to take my analysis quiz to discover the best program for you:
↓
Exercise 3: Shoulder Dislocations
Alright, now back to the last mobility exercise, shoulder dislocations. Here's how you can perform this:
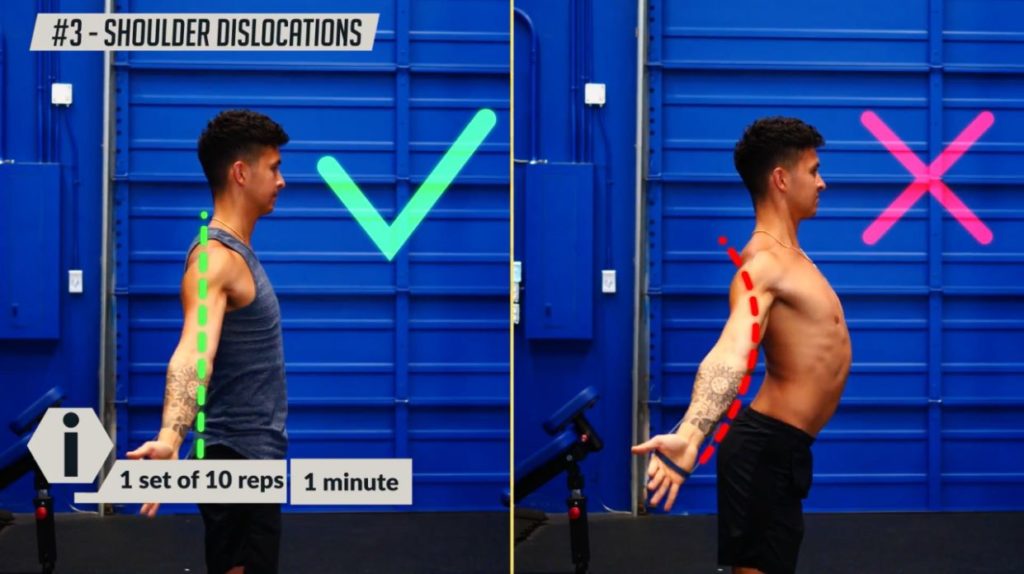
- Stand with your legs under your hips. Squeeze your butt. And lightly brace your core.
- Take a band and push the band apart with your palms facing away from each other and pinkies up. If you don't have a band, you can use a bedsheet instead - and with an overhand grip.
- From there, bring your arms overhead and down towards your butt. Them, back overhead to the starting position to complete a rep.
- You should feel a deep stretch in your chest and the upper back muscles to stabilze your arms.
- Repeat for a total of 10 reps. Avoid arching your lower back and sticking your gut as you do so.
How To Straighten Your Back Part 2: Strengthening Exercises
This article on how to fix your rounded back won't be complete without learning how to activate and strengthen your weak back muscles. Only by doing so will you be able to maintain this good posture.
Exercise 4: Pull Aparts
Here's how to straighten your back with the pull aparts:
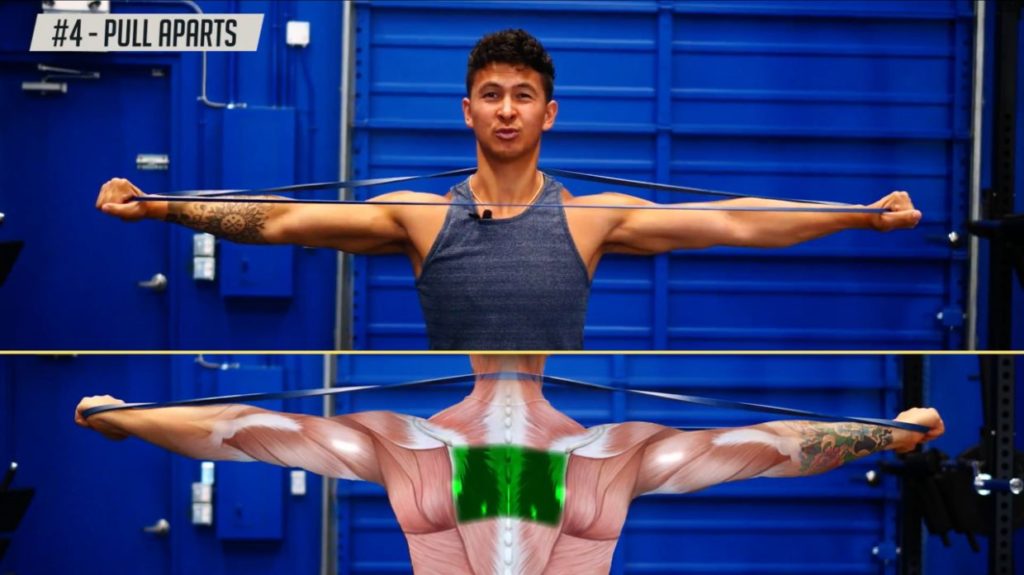
- Setup by standing hip-width apart and squeezing your butt and core.
- From there, place one side of the band around your neck and grab the other side with your arms straight out in front of you.
- Keep your arms straight and drive your elbows apart from one another.
- Squeeze your upper back together. Think about pinching a pencil between your shoulder blades. Avoid arching the lower back or shrugging the shoulders up as you pull the band apart.
- When done properly, you should feel the muscles between your shoulder blades working.
- Hold this end position for 3 seconds. Then, come back to the starting position.
- Repeat for a total of 10 reps.
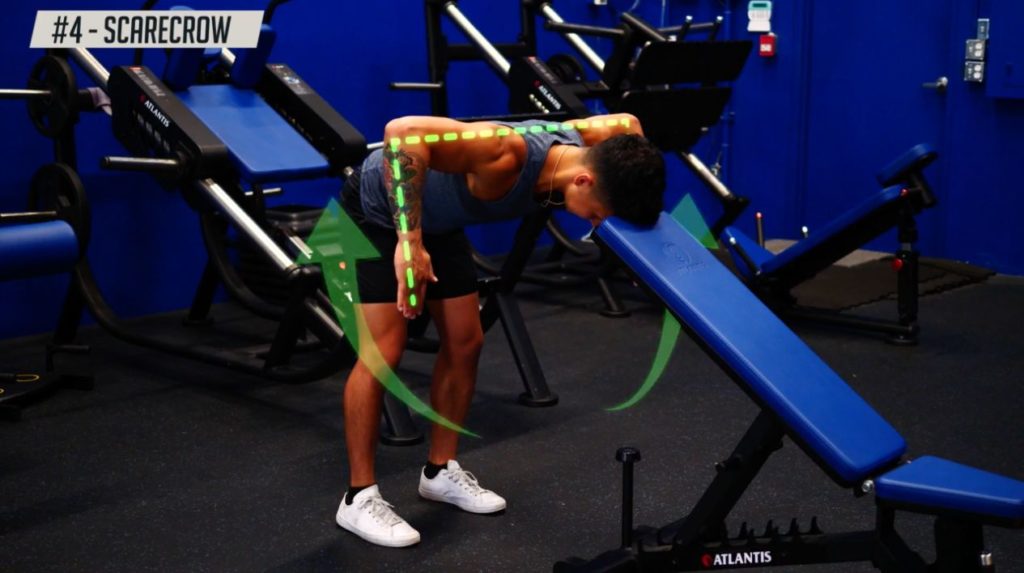
Don't have a band? Then you can perform the scarecrow instead. Here's how to perform that:
- Place your head on a chair, table, or significant other's butt for support.
- Bend over at your hips, drive your elbows out and back - keeping them at 90 degrees.
- Hold that for 3 seconds without excessively arching your lower back.
- Then, rotate as far as you can and hold that end position for another 3 seconds before coming down.
- Repeat for a total of 5 reps.
Exercise 5: YWT's
Now, we'll add a little more difficulty. Here's how you can perform YWT's:
- Lay down on your stomach, squeeze your butt, and flatten your stomach against the floor.
- Move your arms into a Y position overhead with your thumbs pointing up.
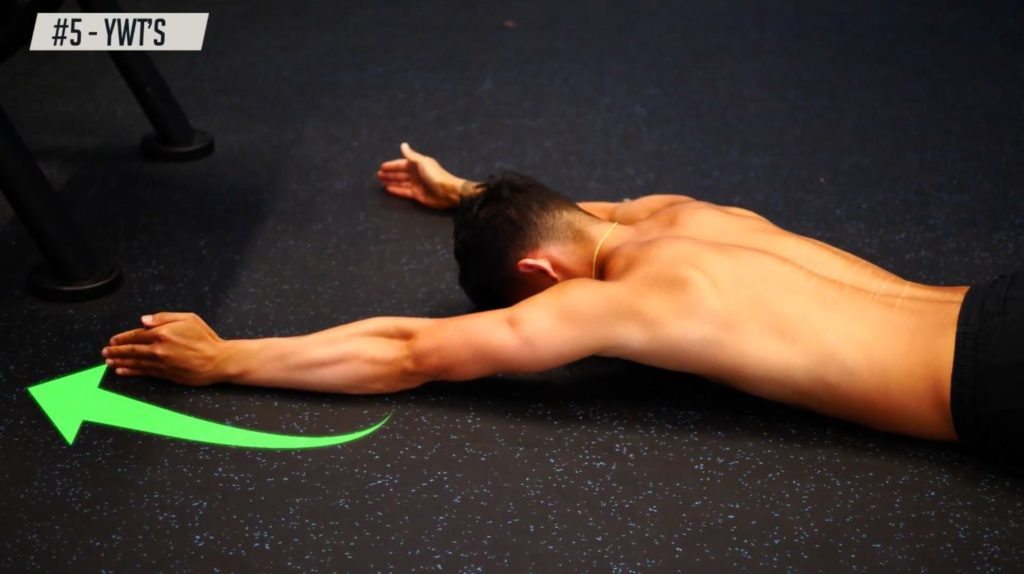
- Then, lift your hands off the ground by about an inch and shrug your shoulders down away from your ears.
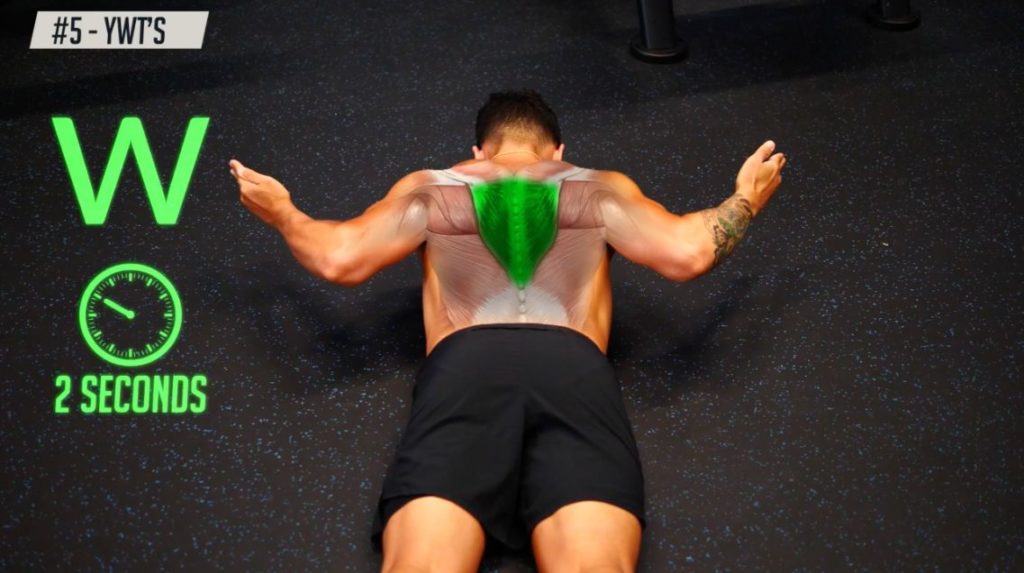
- From here, pull your elbows down towards your hips while squeezing your upper back until your arms form the shape of a W.
- Hold this for 2 seconds. You should feel your mid and lower trap muscles in your back working to maintain this position.
- Then, extend your arms out to the side as you maintain the bcak tension to create the shape of a T. As you do this part, you'll feel yourself fighting the urge to let go of the upper back tension and shrug your shoulders up. Fight that feeling!
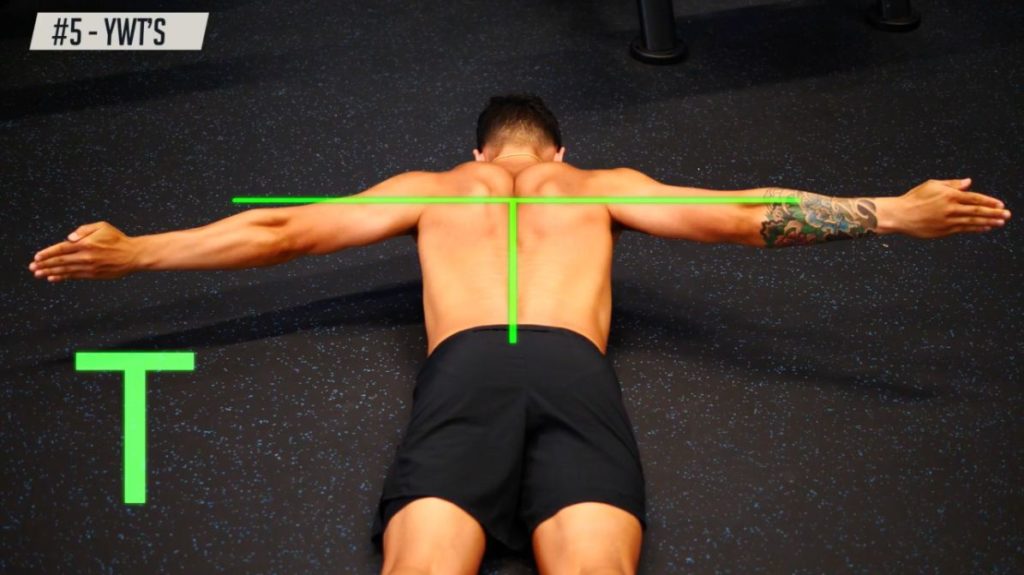
- Once you get to the T shape, hold it for 2 seconds, then pull your arms back into the W. Then slide your hands back up into the Y.
- Try not to allow your arms and hands to touch the ground.
- Repeat for a total of 6 reps.
Need Help With Other Muscle Imbalances Or Losing Fat?
Okay, so you now know how to straighten your back with the 10-minute corrective routine. In case you needed more help with that: here are some past articles I've written on your posture and how you can 'awaken' your glutes that'll help you further improve any existing imbalances.
But maybe you need help with other muscle imbalances? Or, maybe, you need help with losing fat and building lean muscle? To check out our training and nutrition programs that'll help you do just that ... take our free quiz to find out which of our programs are best for you and your specific body:
Click the button below to take my analysis quiz to discover the best program for you:
↓


