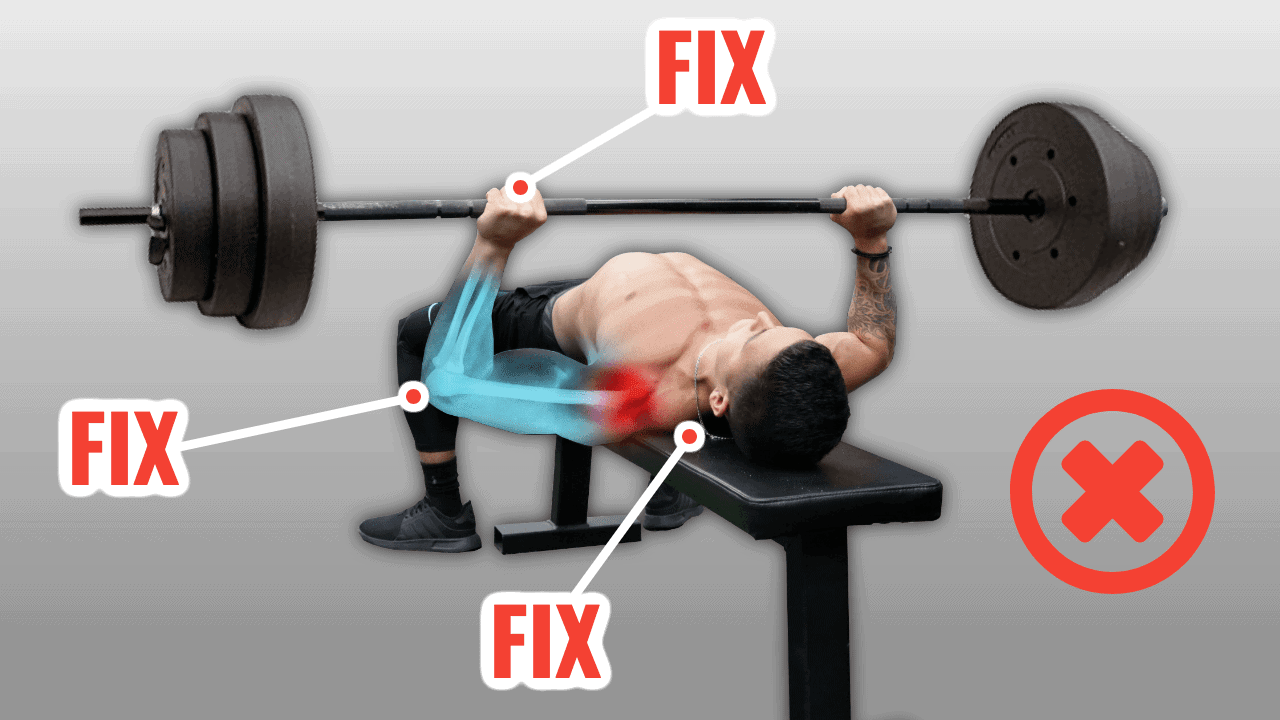
How to Bench Press Without Shoulder Pain: 4 Mistakes You're Probably Making
If you want to learn how to completely avoid shoulder pain when benching, then you need to read this article.
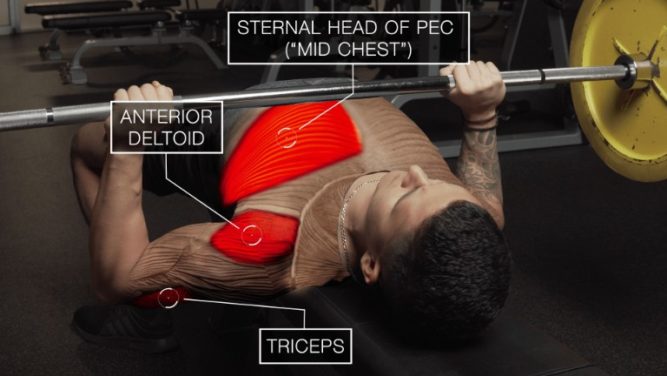
The bench press is one of the most effective exercises for developing and strengthening the upper body, and will primarily target the chest and triceps:
However, despite its effectiveness, it’s also the one exercise that lifters seem to have the most trouble with....
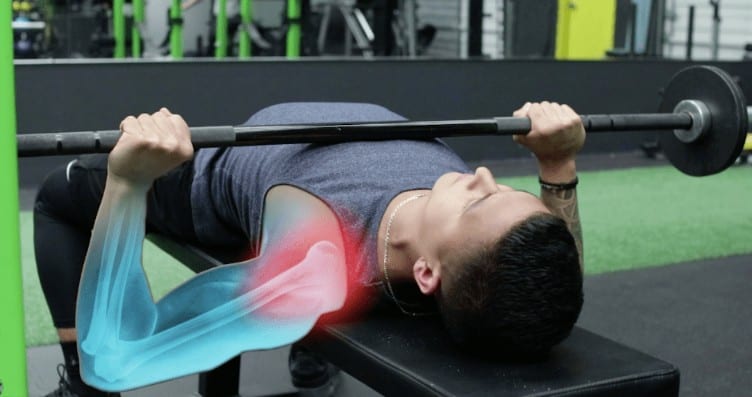
...this is primarily due to shoulder pain during the bench press or after the movement. And in many cases, this is simply a result of various tweaks that need to be made in your bench press form.
In this article, I’ll go through exactly what those tweaks are so that you can minimize your risk of injury overtime and get back to pain free bench pressing as soon as possible.
Of course, this applies to every exercise you perform. There are various things you'll have to take into account if you wish to make progress as fast - yet safely - as possible in the gym. That's why I design every BWS program specifically to help you avoid common lifting mistakes; helping you transform your physique in the most time-efficient manner. For more information:
Click the button below to take my analysis quiz to discover the best program for you:
↓
Mistake #1: Shoulder Blades Not Retracted Throughout The Press
The first bench press form mistake is something most people are aware of yet tend to have trouble properly implementing.
Whenever we’re benching, we want to have our shoulder blades retracted or pinched together as if you were going to pinch a pencil between those blades.
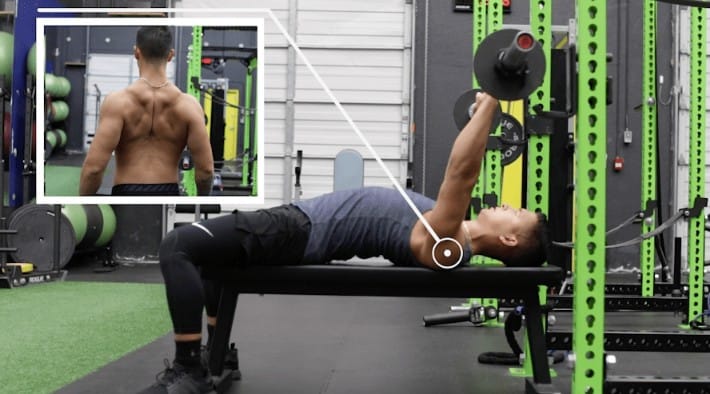
This enables two things to happen:
- The head of our humerus to properly track throughout the press.
- Better activate the chest by minimizing involvement of the front delts.
If we don’t have the shoulder blades retracted, what actually tends to happen is the upper arm will round forward.
This can irritate some of the rotator cuff tissues in the front of the shoulder.
So instead, you want to do the following two things as you set up for your bench press:
- Depress your upper traps by bringing your shoulders down and away from your ears. This takes the upper traps out of the movement and also creates more space within the glenohumeral joint.
- Pinch your shoulders blades together as previously discussed.
You want to then maintain this tightness by actively squeezing your shoulder blades together as you perform the movement. And avoid the common mistake of opening up the shoulder blades and losing tightness at the bottom or as you push up.
Shoulder Blade Retraction Drill
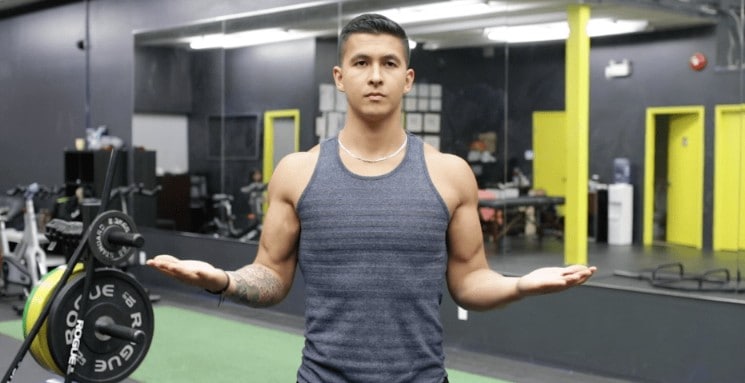
If you struggle with this, I’d suggest trying this "shoulder blade retraction exercise" out.
First, raise your hands with your thumbs pointed out. Then, rotate your arms outwards while squeezing your shoulder blades together like so:
Focus on really feeling the squeeze in your rhomboids right in the middle of your back:
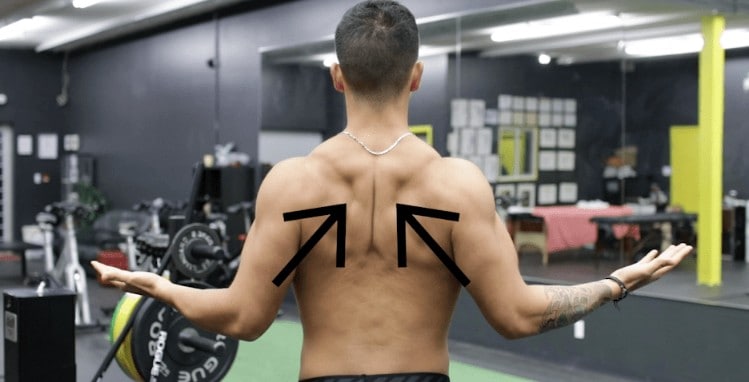
The feeling you get here is the exact feeling you want to achieve while performing the bench press.
So what you can do is perform that exercise immediately before setting up for the press. And then practice maintaining this feeling when benching by using lighter weight and gradually building up towards your working weight.
Mistake #2: Benching With A Flat Back
Another common benching mistake that can cause shoulder pain is pressing with a completely flat back.
Although most people won’t need an exaggerated arch as seen with powerlifters, you do want to ensure there’s some arch present in your upper back:
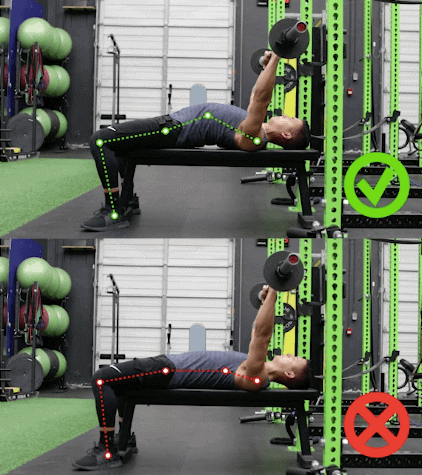
And the reason for this is similar to what we saw with retracting your shoulder blades. As a slight arch in the upper back places the glenohumeral joint in an externally rotated, safer position.
Meaning that it effectively avoids putting your shoulders in a dangerous internally rotated position at the bottom of the press, which commonly occurs when pressing with a completely flat back.
But to properly implement this while avoiding injury, note that you’re not simply arching your lower back.
What you want to do is arch your upper back instead by:
- Retracting your shoulder blades as we previously discussed
- Raise your chest up towards the ceiling which will naturally create space between your back and the bench
- Maintain this arch as a solid base of support for your press.
Properly implementing the above three step process to your bench press form will drastically improve the shoulder pain you experience when benching.
Still not sure if you're performing your chest exercises correctly - and optimally for muscle growth in the gym? Don't worry. Our 3-on-1 coaching program can help. My team of experts here at BWS – and I – will always take the time to explain the dos and do not's of each exercise's execution in your personalized training program. Find out more about how we can help you achieve your dream physique below:
Click the button below to find out more about the 3-on-1 coaching program:
↓
Mistake #3: Wrong Touch Position
One of the most common bench press form mistakes people make is touching the bar too high on their chest at the bottom position.
This is usually done as a result of excessively flaring the elbows out at a 90 degree angle while pressing the bar straight up and down:
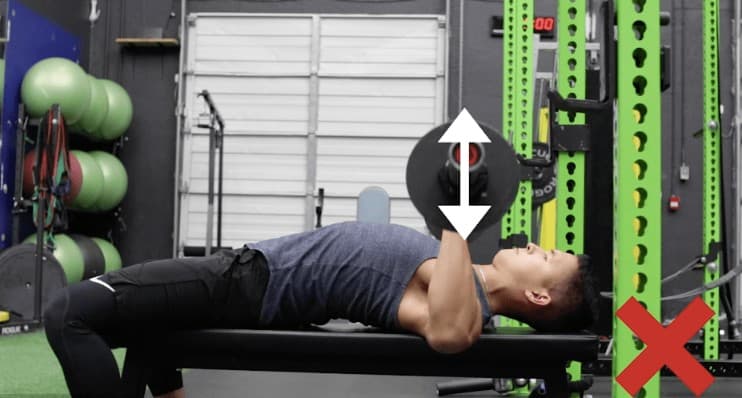
How does this contribute to shoulder pain when benching?
Well, as shown in this 2016 paper that analyzed shoulder pain in the bench press:
Touching the bar too high on the chest with the elbows flared out increases the compressive forces at the clavicle and increases the net torque placed on the shoulder.
And as a result, this quite obviously increases the likelihood of you experiencing shoulder pain when benching.
So what you want to do is instead realize that the bar path of your bench press shouldn’t be straight up and down.
In fact, a proper bench press bar path should:
1. Start above your shoulder:
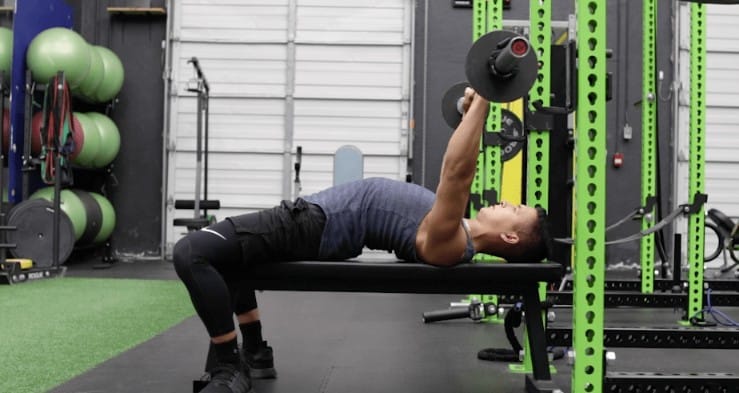
2. Come down to around the level of your sternum or nipple height:
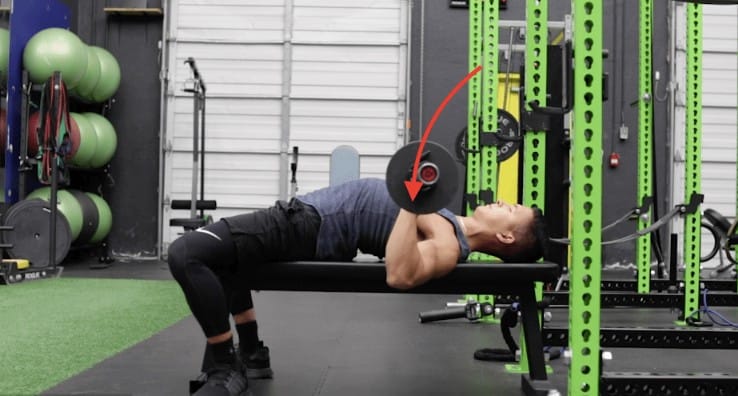
3. Curve diagonally back towards the starting point over the shoulder:
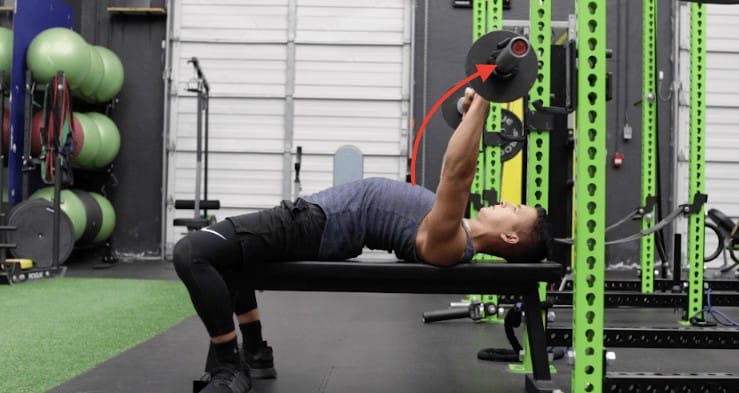
Simply meaning that the bar path should be curved diagonally, and you'll be pushing slightly backwards rather than straight up and down.
And to achieve this without harming your shoulders, you need to tuck your elbows to roughly a 75-degree angle:
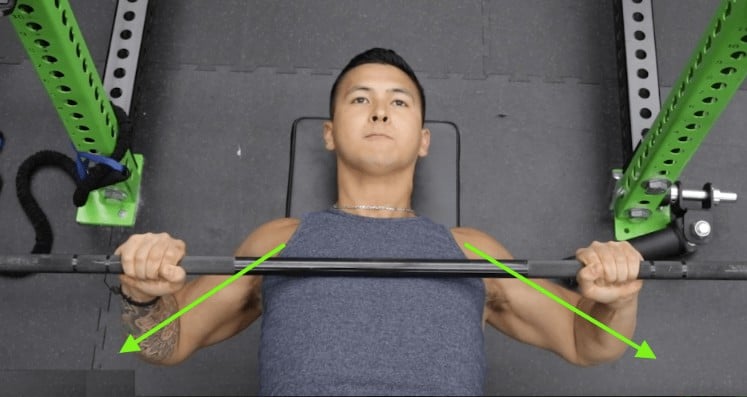
Such that your elbows remain closer to the body and more or less directly under the bar throughout each rep.
This will not only lead to a safer press, but a stronger one as well.
Mistake #4: Elbows Not Stacked Under The Bar
A harder to catch yet very common bench press form mistake is not properly aligning the elbows during the press.
Meaning that the elbows are not in line with the hand and not stacked under the bar:
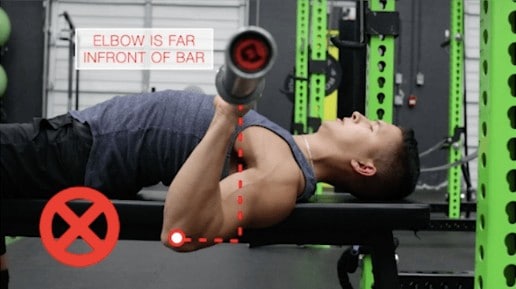
This creates unnecessary torque on both the elbow and the shoulder joint, likely contributing to your shoulder pain when benching.
And to fix this, there’s two things you need to do.
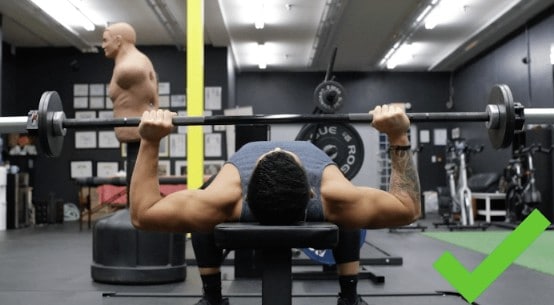
1. If your elbows are unaligned when viewed from the front or back, then the problem is likely with your grip width.
As shown below, gripping the bar too wide will inevitably cause the elbows to be unaligned:
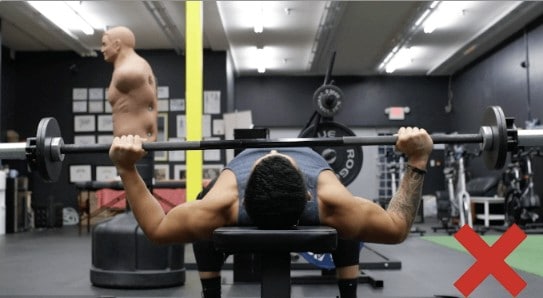
And, as stated in this review paper analyzing the shoulder joint, is problematic since it increases the demand placed on the rotator cuff.
Whereas gripping the bar too narrow will also cause the forearms to be misaligned and will turn it more into a triceps dominant movement:
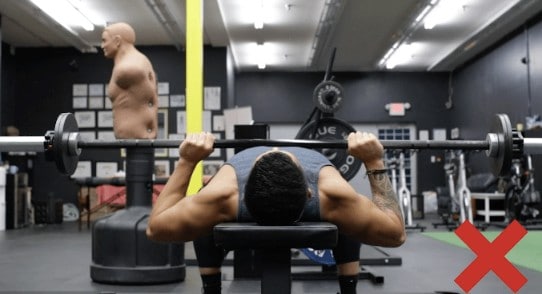
Thus, you want to play around with your grip width until you find the width that feels best and enables your elbow to remain stacked under the bar:
2. If your elbows are unaligned when viewed from the side, then it’s likely that you’re not properly tucking your elbows.
This mistake is often a result of "overtucking" your elbows too close to your sides when you press.
But luckily, fixing this is quite simple. You basically just want to adjust the angle of your elbow during the press by flaring them out a little more such that they remain relatively underneath the bar:
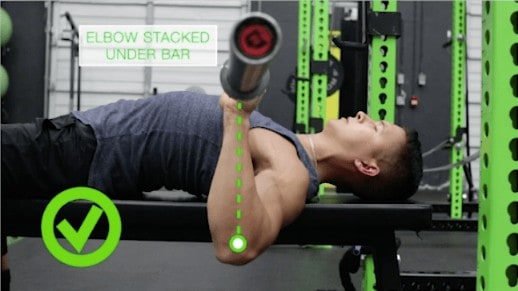
You'll likely have to play around with the degree of your elbow tuck in order to find what both feels best and enables your elbows to remain stacked under the bar.
I'd also highly recommend videotaping yourself performing the bench press from the side and from the back. This can help you visually see small errors you're making and correct them.
But regardless, try implementing the tips I mentioned as they lead to not only a safer press, but a stronger one as well.
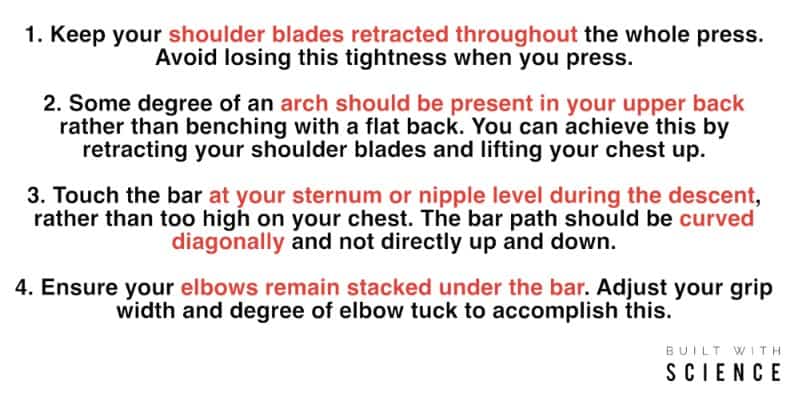
Key Points
To sum the article up for you, here are the main points to keep in mind:
As I say quite often, if you want to see the best results then it’s vital that you choose the right exercises and variations. But, even more importantly is that perform these exercises in a way that enables you to progress the fastest and avoid injury overtime.
AND...
If you're serious about transforming your body, then BOTH your training and your nutrition needs to be optimize based on your specific starting point.
This is what is going to enable you to progress at the fastest rate and is why thousands of members are experiencing incredible results with the #BuiltWithScience programs.
Within my programs you’ll have access to weekly workouts, a powerful nutrition software, in depth exercise video tutorials, meal plans, a private Facebook group, and so much more.
To get started with your transformation today, simply take my starting point quiz below to determine which program is best for you:
Click the button below to take my analysis quiz to discover the best program for you:
↓
Anyways, that's it for this article – hope you enjoyed it and found it useful! Don’t forget to give me a follow and connect with me on Instagram, Facebook, and Youtube as well to stay updated with my content. Cheers!


