How To Fix Shoulder Impingement FOR GOOD! (10 Minute Routine)
Suffering from aches, pains, popping, and/or instability in your shoulders? Read this article. Here, I cover the 10-minute routine you can do to fix and prevent shoulder impingement.
Before we dive into the solution for shoulder impingement though... Let’s talk about how you got here in the first place.
What causes shoulder impingement?
Odds are, two things contributed to this (and are continuing to worsen the problem):
- Muscle imbalances around your shoulder - Created as a result of spending too much time in poor posture. Over time, this tightens the muscles in front of your shoulders, which pulls it forward into a rounded position. Plus, it also weakens the important back muscles that are supposed to keep it back in place.
- What you do during your workouts - Where you worsen the muscle imbalances previously mentioned by overtraining your pushing and internal rotator muscles. While, at the same time, neglecting the often overlooked rotator cuff and scapular muscles. These are the ones responsible for keeping your shoulders healthy.
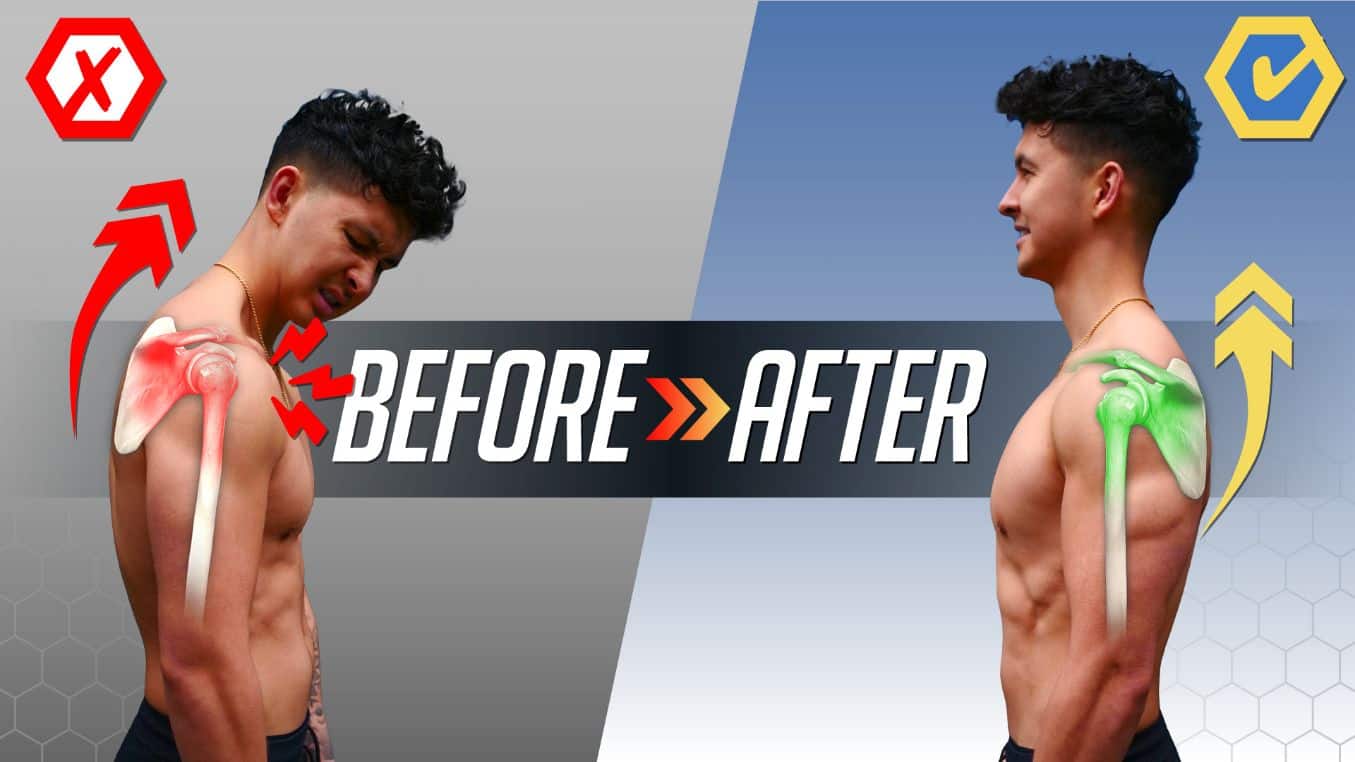
Combine these two things and you have the perfect recipe for the occurrence of a common type of shoulder impingement. But wait. What is a shoulder impingement? Well, this can happen when, as a result of your muscle imbalances, certain parts of your shoulder are moved out of their proper position. This can then cram up your shoulder joint, which leads to pinching in one of your rotator cuff tendons. As a result, you'll experience pain in your shoulder. Especially when lifting your arms overhead or behind your back.
It's frustrating. That's why I never neglect to account for additional rotator cuff and scapular muscles work in my programs. Removing the risk of shoulder impingement thus allows you to achieve your ideal physique in the most time-efficient manner. If that sounds good to you:
Click the button below to take my analysis quiz to discover the best program for you:
↓
Test for shoulder impingement
In fact, you can test for shoulder impingement by raising your arms up with your thumbs up. Repeat this but with your thumbs down. If you experience pain or the pain worsens in the thumbs down position, this is an indication that you may have this specific type of impingement. Another indication is if your shoulders feel better when you press with a neutral or underhand grip instead of overhand.
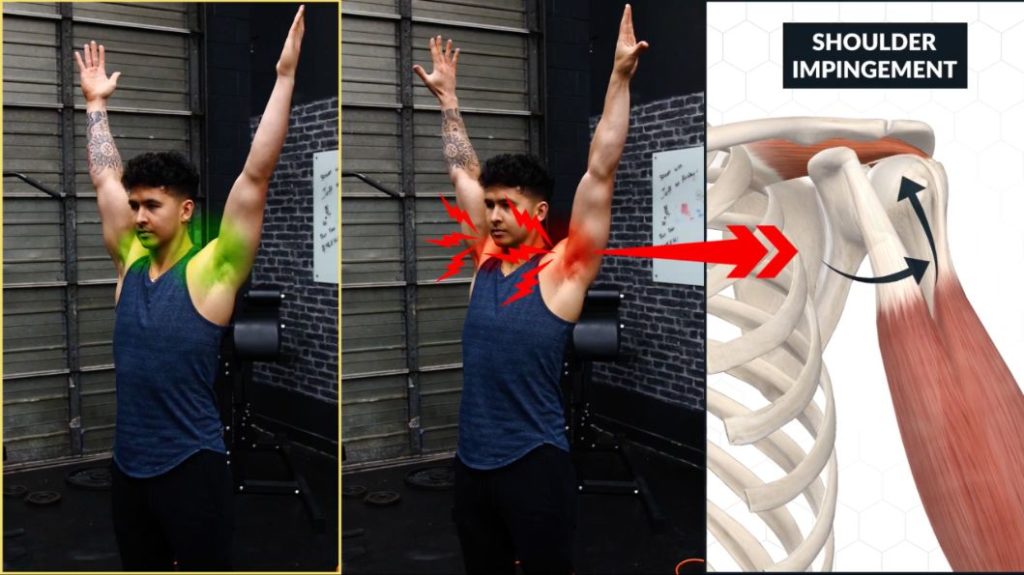
Regardless, the key to fixing, preventing shoulder impingement, and just and keeping your shoulders healthy general is quite simple and involves 2 easy steps.
How To Fix Shoulder Impingement
Step 1: Create More Space In Shoulder Joint
The first step here is to create more space in your shoulder joint. This helps relieve the pinching on your tendon. And, as a result, the pain that you’re feeling. To do so, we need to activate the various muscles you’ve been neglecting and have weakened over time. As for what these muscles are, as shown in the following graphs, most of the studies that have analyzed subjects with impingement find a:
- Decreased activation of the lower traps and the serratus anterior on the injured side AND
- Weakness in the external rotators of the shoulder
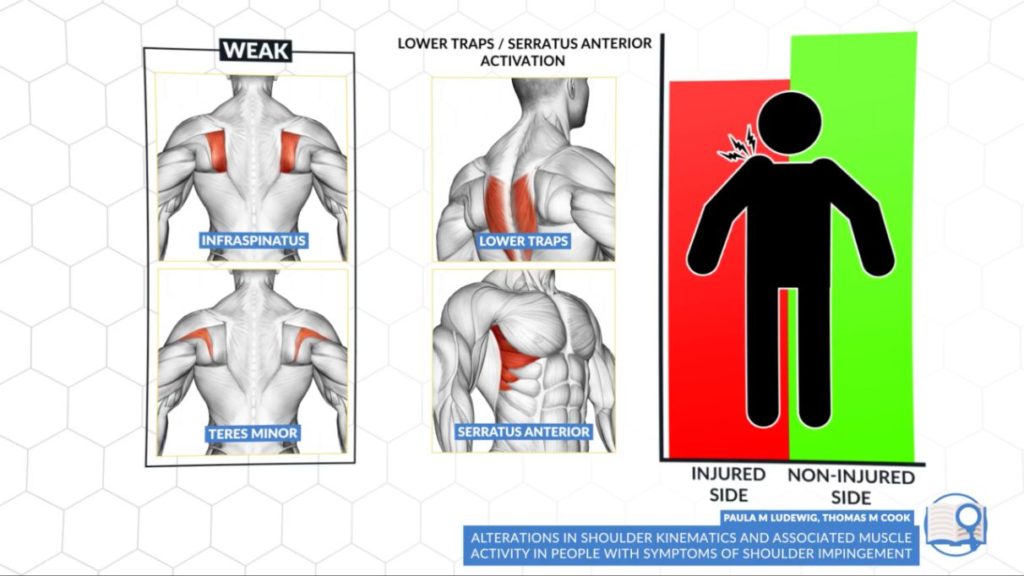
Meaning that to fix shoulder impingement, we want to focus our efforts on activating and strengthening these specific muscles (with various exercises and stretches).
How To Strengthen The Lower Traps
The first muscle, the lower traps, can easily be activated and strengthened with a simple bodyweight progression. Level 1 involves first lifting your chest off the ground slightly by using your mid-back muscles. Then, raising your arms up while turning your palms out. And then pulling your shoulder blades back and down as if you were reaching your fingers down towards your feet. These are the two main functions of the lower traps and the key to activating them. Hold this position for 10 seconds and then repeat for more reps.
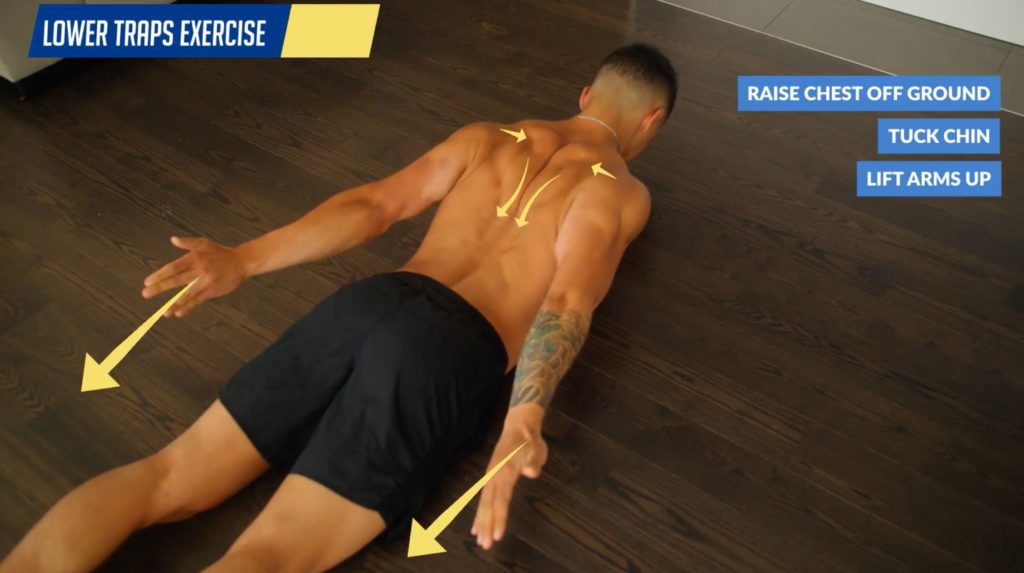
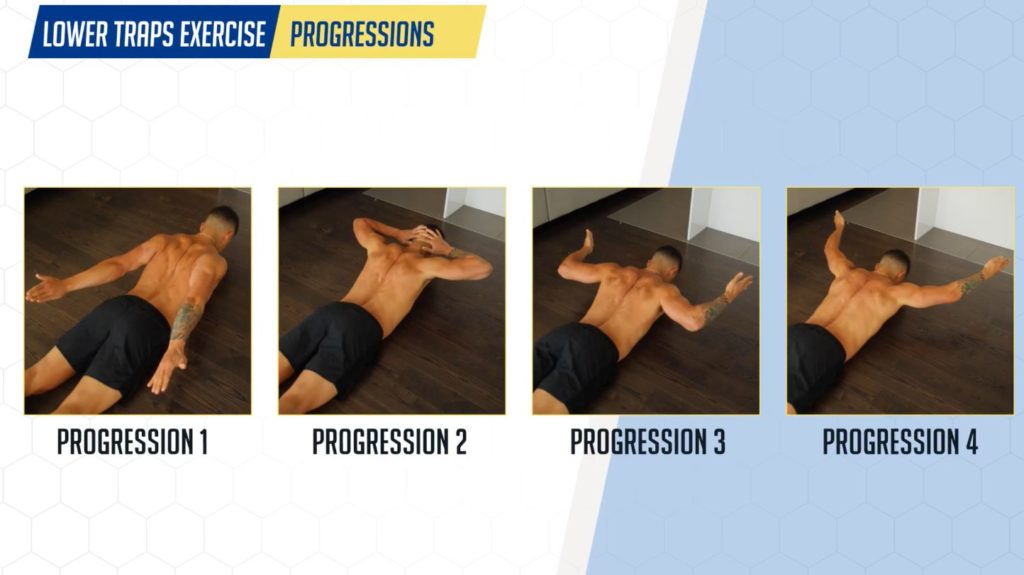
You should feel a strong activation just above your lower back. Then, as you get stronger you can progress to the next progressions (that you can find in my previous article on how to fix a hunched back posture). But still apply the same concepts of raising your chest off the ground. And focusing on squeezing your shoulder blades back and down.
How To Strengthen The Serratus Anterior
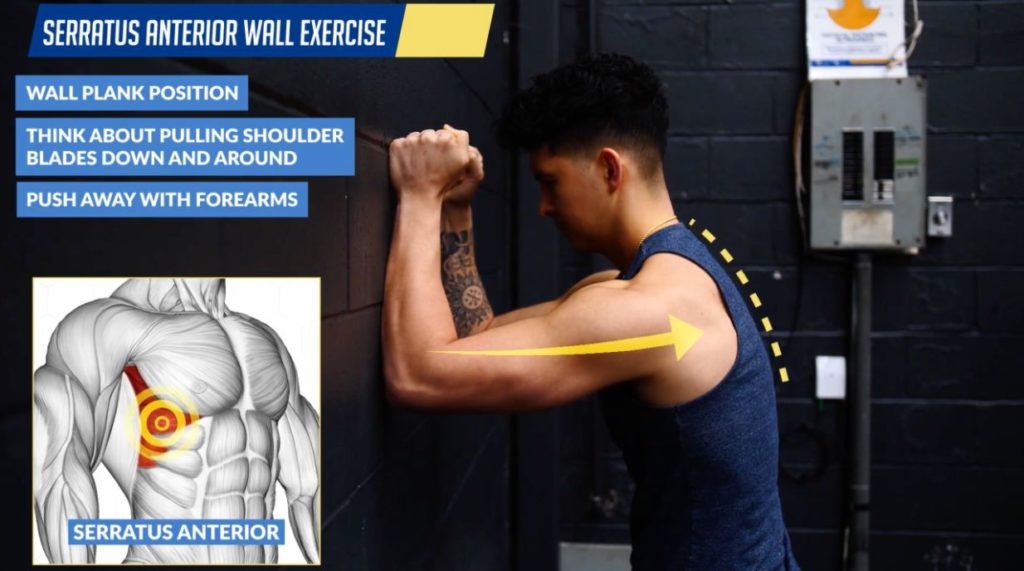
Next, we're going to strengthen the serratus anterior. We’re going to first focus on activating it in the first place with the following drill:
- First, assume a wall plank position with your forearms on the wall.
- Then, think about pulling your shoulder blades down and around your ribs by pushing away from the wall with your forearms.
- You should feel the contraction in the region shown here.
- If you can’t feel anything, try to round your back as you push your forearms into the wall.
- Hold this for 20-30 seconds and then repeat for more reps.
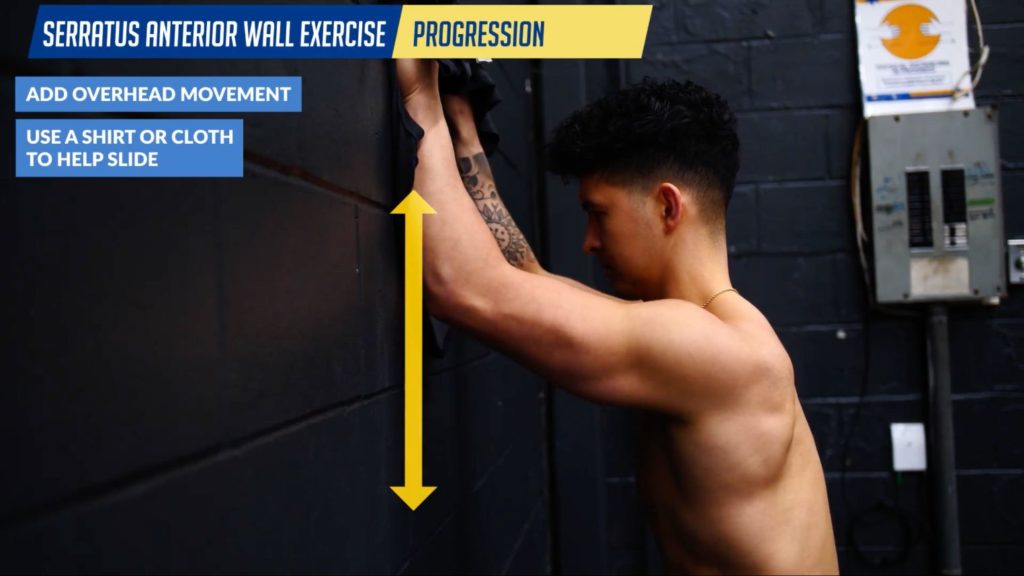
To progress this, you can start adding overhead movement (if you can do so pain-free) by using a shirt or cloth to help slide your forearms up and down the wall as you actively push against it.
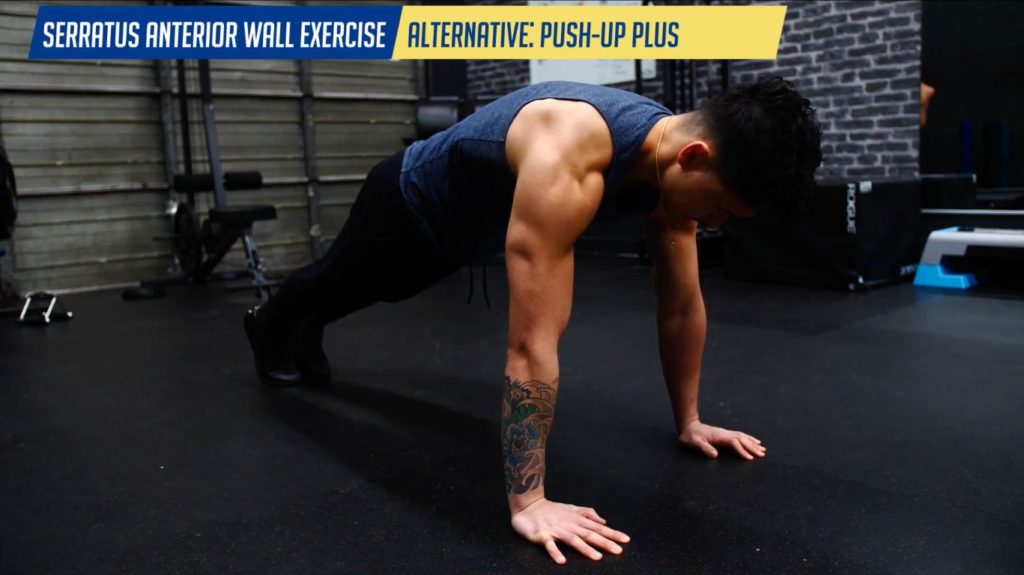
If that progression causes pain, then switch it out for the push-up plus. This is where you apply a similar technique but by pushing into the ground instead of on the wall.
Knowing how to tweak/replace exercises that suit your training goals is pretty complicated. Thankfully, though, the team here at BWS has the necessary expertise to do just that. Our 3-on-1 coaching program takes the guesswork out of training, nutrition, and even mobility work - so you can focus on what matters: making gains. If you're interested:
Click the button below to find out more about the 3-on-1 coaching program:
↓
How To Strengthen The External Rotators
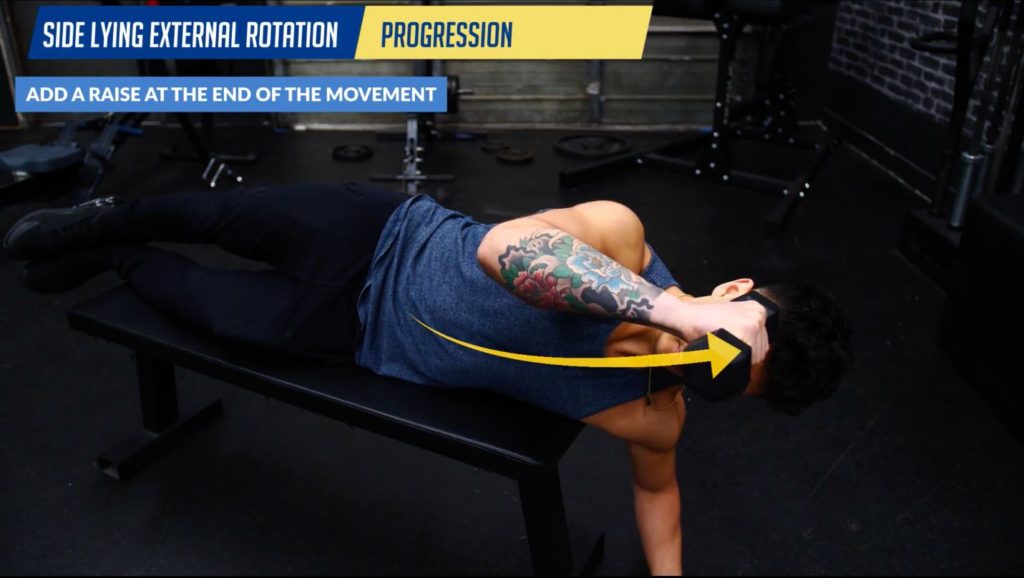
Lastly, to strengthen the external rotators, we’ll perform the side-lying external rotation with a light dumbbell. Or, if that's not available, even a book or water bottle would do. I’d also suggest adding a rolled-up towel or shirt under your upper arm. Doing so has been shown to help prevent compensations and boost activation by 20%.
Next, pull your shoulder blades back and down and keep them locked. Then, simply rotate your arm upwards while keeping your elbow pinned to the side. When done properly, even with just minimal weight, you’ll quickly feel a burning sensation in your shoulders. This signals to you that you're successfully activating and working your weak external rotators!
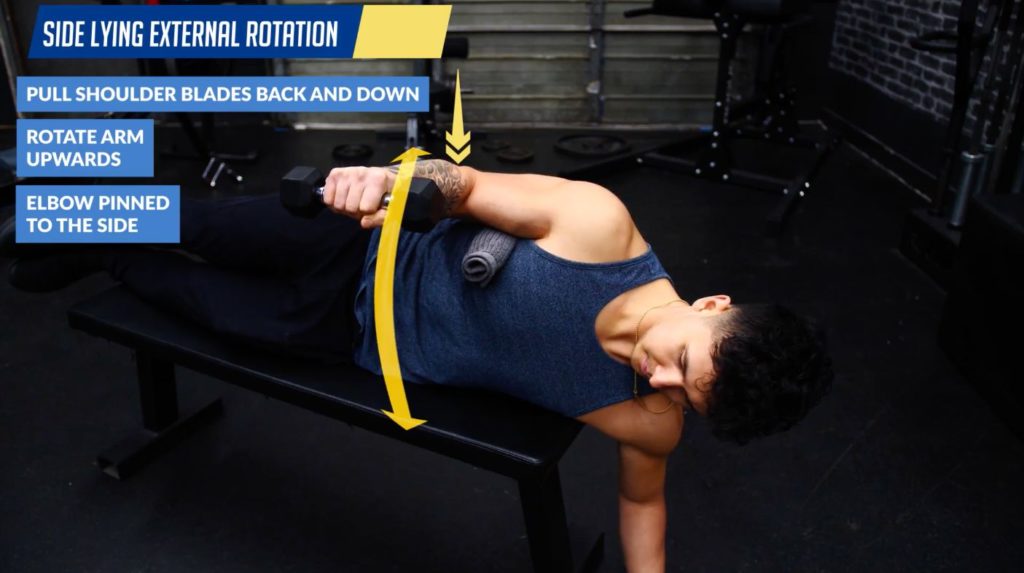
To eventually progress this (only if you can do so without pain), you’ll want to add a raise at the end of the movement. This will help train your external rotators in a more functional, 3D manner. And will be the key to regaining your ability to press overhead pain-free.
Step 2: Address The Root Cause
The next step is to address the root cause. As mentioned earlier, this lies in the various mobility restrictions created by a sedentary lifestyle or extended periods spent in poor posture. The exercises we did earlier may help alleviate pain and improve shoulder function in the short term. But it's not enough. The truth is that a lack of mobility in key areas can cause you to continue having recurring shoulder issues in the long run. This is particularly because of the ways your body will compensate during exercises.
No amount of rotator cuff strengthening would truly fix the issue. This is why in step 2, you need to focus on mobilizing some of the tightened structure. And address the poor positions that likely caused the issue in the first place.
Now I have done quite a few articles on improving mobility and would highly suggest you take a look at the following to start:
Addressing The 2 Most Problematic Areas: The Pecs And Mid-Back
...But the two most problematic areas we’ll want to look at are the pecs and the mid-back.
When the pecs are tight, they pull our shoulders into this forward rounded position. To help mobilize them, all you need is a wall or something to prop your elbow against. Keep your elbow at 90 degrees and brace your core. Lunge forward gently until you feel a stretch in your pecs. Then, slide your arm up and down slowly to stretch out the different fibres and muscles of your chest. Do this for 30-60 seconds and then switch sides.
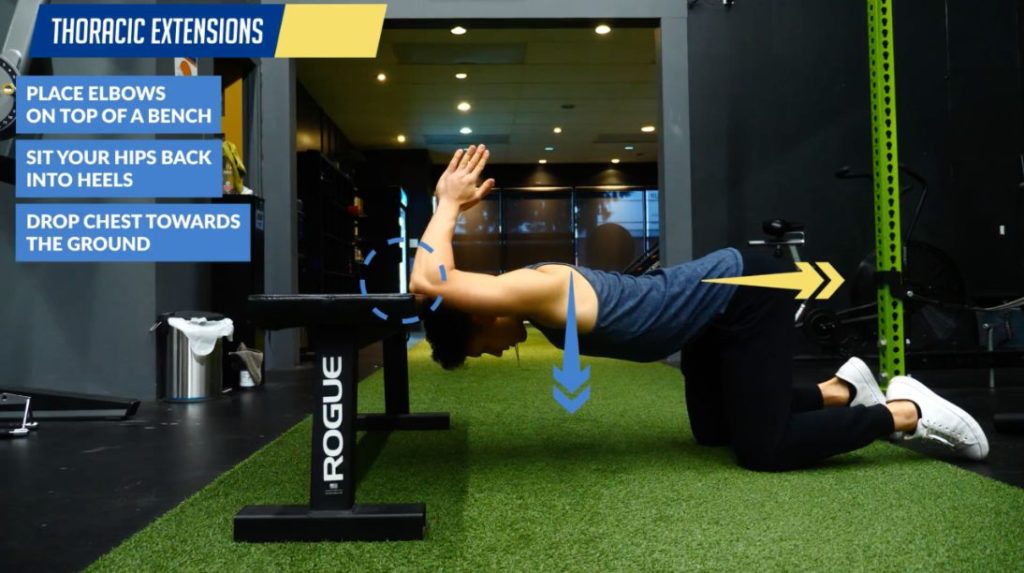
After this, we’ll work on the mid-back with the following simple yet effective thoracic extension move. To perform this movement, place your elbows on top of a bench or couch with your hands together. Sit your hips back into your heels and simultaneously drop your chest towards the ground. Hold that bottom position for a few deep breaths before repeating for more reps.
By working on these two specific areas, while focusing on just being more aware of your posture throughout the day, you’ll be able to address the root cause of your shoulder pain for long term success rather than just short term relief.
Fixing Your Shoulder Impingement: Summary
So, as a summary, here’s the corrective routine that you’ll want to run through initially 2-3 times a day. Part 1 focuses on creating more space within your shoulder to relieve the pain caused by an impingement. And part 2 then focuses on mobilizing some of the areas that likely contributed to the impingement in the first place.
Part 1:
Lower Traps Exercise Progression: 10 reps with 5-10s pause at top
Serratus Anterior Wall Exercise: 5 reps with 20-30 second holds (progress to sliding version)
Side Lying External Rotation: 15-20 reps (progress to raising arm version)
Part 2:
Pec Stretch: 5-10 reps sliding up/down wall each arm
Thoracic Extensions: 10 reps with 2s pause at bottom
Takeaway
By implementing these two parts, you’ll be able to not only quickly relieve your shoulder but will also be addressing the root cause of the problem. Now although it may sound tedious, you won’t need to do these every single day indefinitely. If you simply choose the right exercises to include in your workouts, while making an effort to move more and be mindful of your posture throughout the day, you’ll be able to keep these muscles strengthened and prevent imbalances from occurring without having to do a ton of different corrective exercises every day.
And for those looking for a complete step-by-step program that uses science to show you how to properly train AND eat week after week to transform your body in the most efficient and injury-free way possible, then:
Click the button below to take my analysis quiz to discover the best program for you:
↓
Anyways that’s it for today guys! I hope you all enjoyed it! Don’t forget to give me a follow and connect with me on Instagram, Facebook, and Youtube as well, in order to stay up to date with my content.


