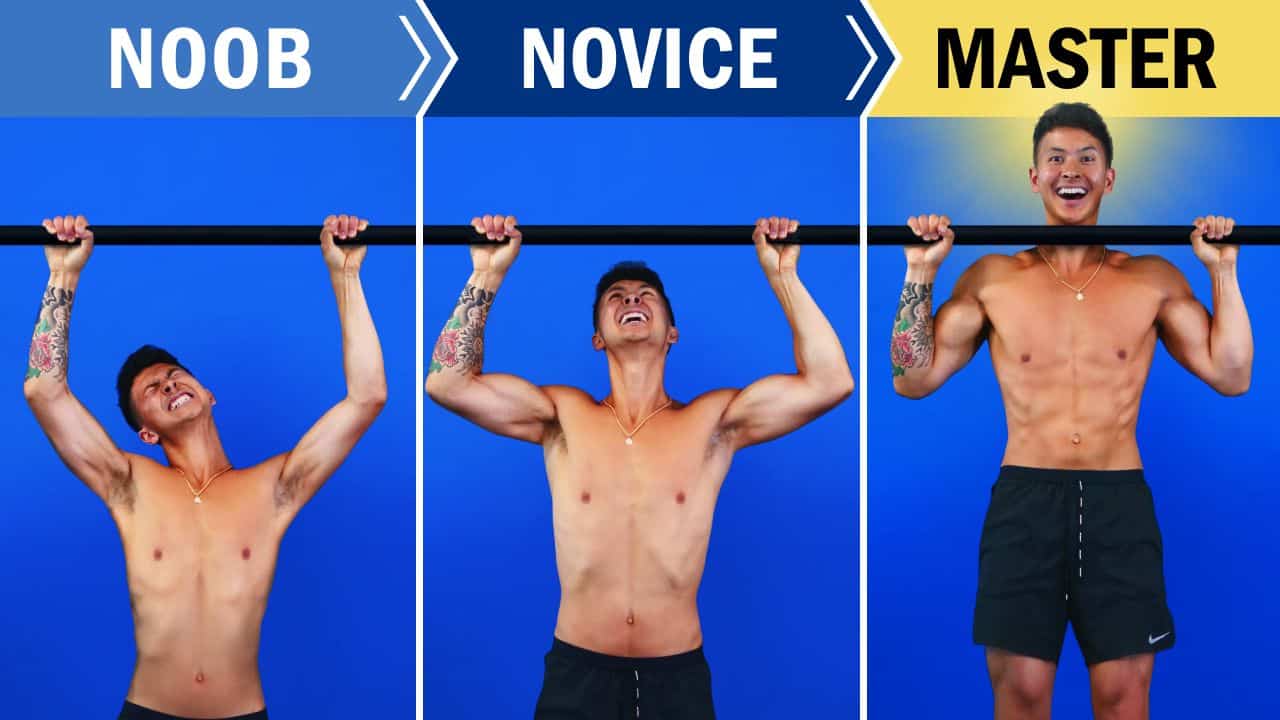
The Most Effective Way To Master The Pull-Up (4-Step Progression)
Many people find it challenging to master the pull-up. As tricky an exercise as it is, though, there is actually a 4-step pull-up progression you can implement that'll make mastering the exercise much easier (and faster) for you.
I'm going to share with you the most effective 'progression routine' that'll help you master the pull-up. We'll cover the following in this article:
- The science behind the 5 key muscles that make mastering the pull-up so difficult THEN
- The best exercises to strengthen these pull-up muscles by about 56% quicker than normal
By the end of this article, you'll know exactly what to do in each step of the 4-step progression pull-up routine. And that'll teach you what you need to know about getting your pull-ups from the beginner to novice, then finally to the master stage.
Looking for a program that'll guide you through, in a step-by-step manner, the best way to master an exercise you've been struggling with for a long time? Stop searching - because you'll find it right here on Built With Science. Every program takes your through the best progression that'll take you from beginner, to novice, to the master stage, for every exercise (and in the FASTEST time possible). If you’re interested:
Click the button below to take my analysis quiz to discover the best program for you:
↓
A Science-Based Explanation On Why The Pull-Up Is So Challenging
Pull-ups can be very difficult to master for 2 main reasons:
- Reason 1: Pull-ups require a certain amount of strength in several key muscle groups that tend to be weak. But which muscle groups, exactly? A 2018 study reveals them to be the core, lats, mid and lower traps, along with the biceps.
- Reason 2: Pull-ups require your body to get the above-mentioned muscle groups to work together. Your mid traps, lower traps, and core muscles have to keep your body stable while your lats and biceps pull your body up. This is something other pulling exercises don't require.
So, to help you master the pull-up, we'll use a 4-step progression plan. Here's a sneak peek at what'll happen in each step:
- One: We're going to first use pull-up variations that are as similar as possible to the standard pull-up - only, they're not as difficult as the latter.
- Two: Then, we'll throw in appropriate accessory exercises to further strengthen the key muscles involved in the pull-up.
- Three: We'll reveal how you can continue strengthening these key muscles over time. Doing this will help you reach the point where you have the required strength to master the pull-up.
- Four: The final step in the 4-step pull-up progression routine shows you how to use chin-ups to get your first few pull-ups.
Step 1: Start With The Right Variations
Let's dive into step 1 of your 4-step pull-up progression routine: pull-up variations. Research has shown that practicing an exercise 3x/week can accelerate strength gains by about 56% compared to practicing it only once a week. So, we're going to use 3 different pull-up variations to match that ideal training frequency.
And to further accelerate your strength gains by another 20% or so, we'll perform these pull-up variations with a method called daily undulating periodization. This is just a fancy way of saying we'll train each variation with a different number of reps.
Variation 1: Kneeling Lat Pulldown
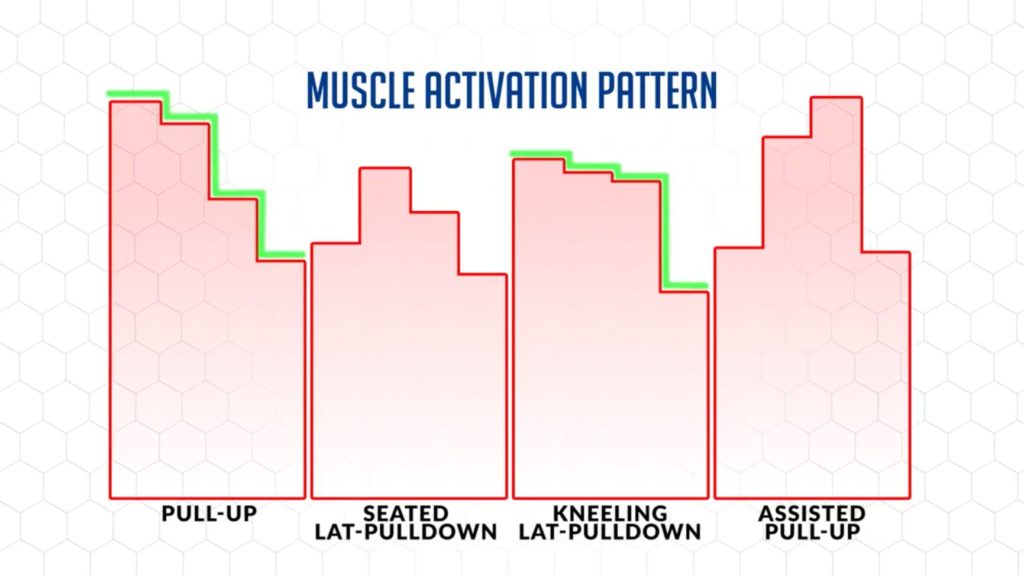
The reason why the kneeling lat pulldown is included in the list of pull-up variations is because of this unique study. Here, researchers examined a handful of pull-up variations to see which best matched a real pull-up.
As you can see in the following graph, the kneeling lat pulldown was found to have the most similar muscle activation patterns as with the standard pull-up. An important point to note: this finding is only relevant when the exercise is set up correctly.
Now, we'll do 3 sets of 5 reps of this pull-up variation. Because you must have been wondering, here's how to properly set up the kneeling lat pulldown:
- Get on your knees
- Use a medium grip on an overhand lat pulldown attachment
- Set the weight such that it's heavy enough to pull your knees slightly off the ground by an inch or so
The final point is crucial in helping you maximize the strength benefit and core activation you get from this exercise.
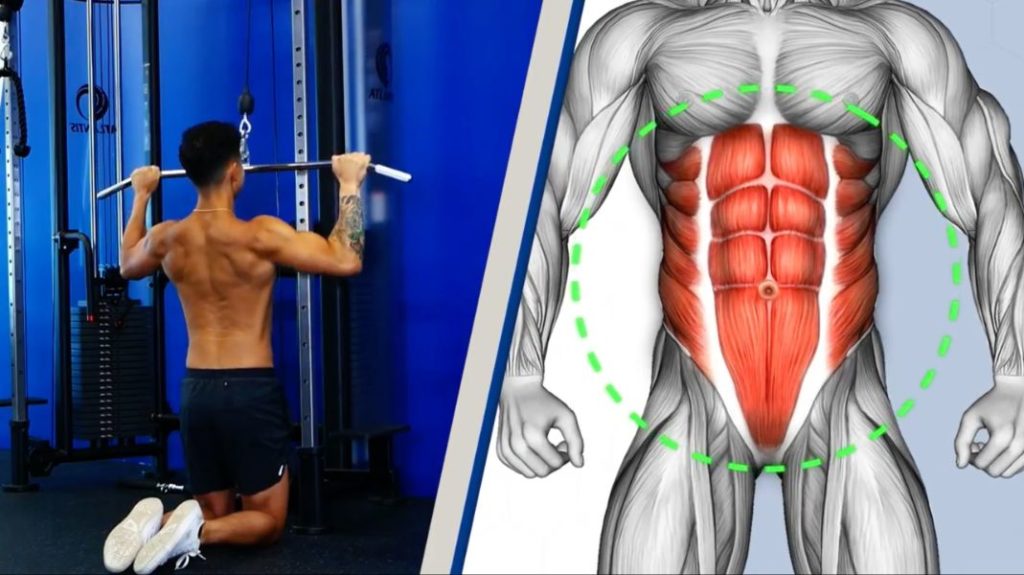
Don't have a pulldown available? Then an alternative would be to do kneeling pull-ups under a smith machine - or any bar. Use your legs sparingly for help to ensure you're still involving your pull-up muscles.
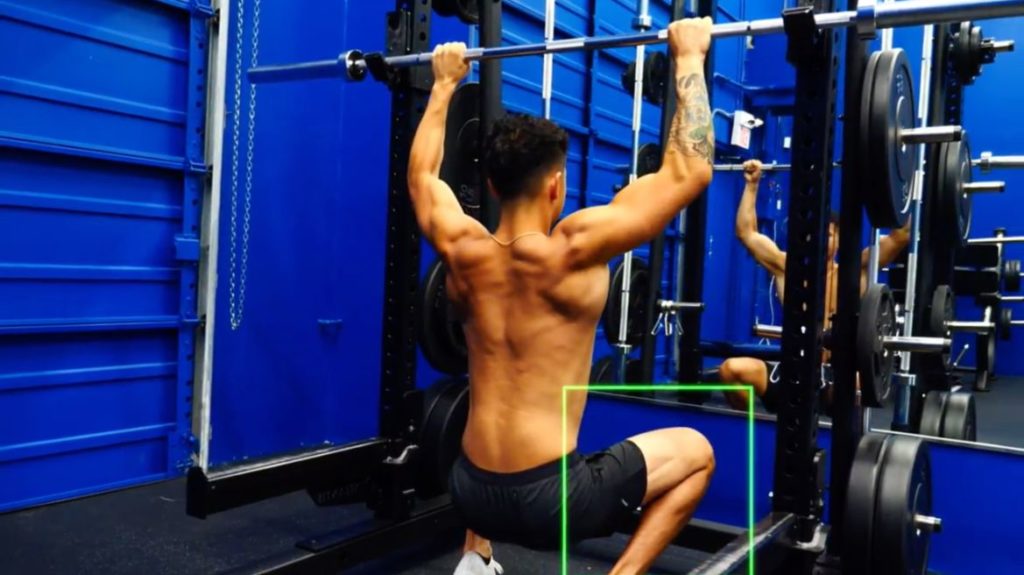
Variation 2: Negative Pull-ups
Variation 2 will be your 'secret weapon' in gaining the strength you need for the standard pull-up. And is also something we incorporate heavily into my Built With Science programs because of its unique benefits.
The 'downward' portion of an exercise has been found to play an important role in building strength. Why, you ask? Well, that's not yet fully understood. But still, it appears to do this by providing a unique stimulus to the muscle (that the muscle wouldn't have gotten otherwise from the upward portion of an exercise).
Doing negative pull-ups will be especially beneficial. That's because although you don't have the strength needed to do the upward portion of the exercise, with the right setup, you will have the strength to do the downward part of it.
We're going to do 5 sets of just 1 rep with these. You'll need a high stool or any platform setup below a pull-up bar that'll allow you to start from the top position of the pull-up. Then, you're going to simply lower yourself down as slowly as you can.
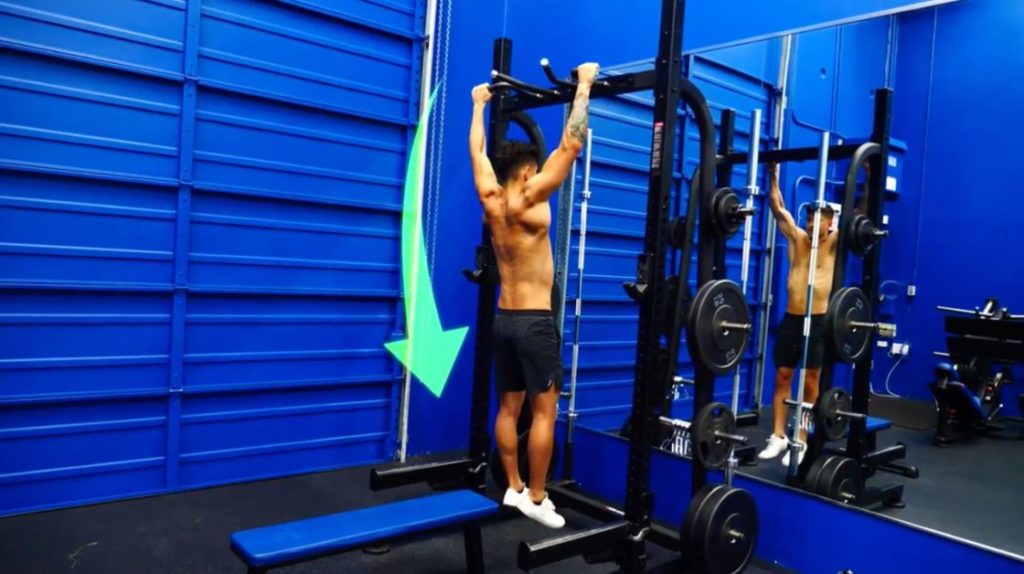
Variation 3: Banded Pull-ups
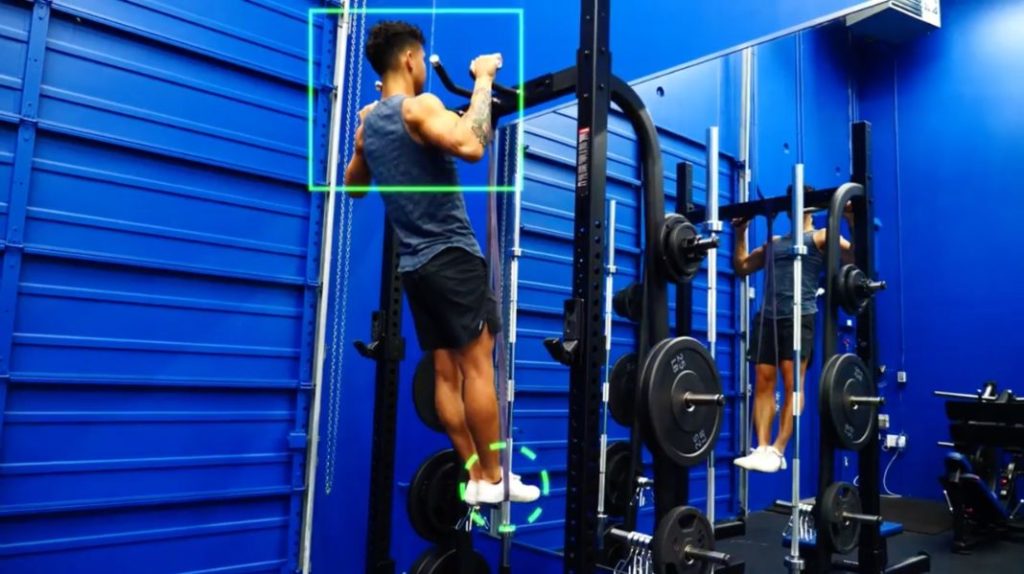
When properly set up, variation 3 will be the closest thing you'd get to performing a standard pull-up. A banded pull-up is a much better option than an assisted pull-up machine because it activates the core to a much higher degree. In other words: the banded pull-ups will assist you in working toward a standard pull-up.
We'll do a total of 3 sets for this variation.
To perform it, you'll first need a band of the right resistance. You can tell if it's the right resistance if you can get between 4 to 8 reps with it. You can also use two bands if needed to create the perfect amount of resistance.
To perform banded pull-ups:
- Loop your band over the pull-up bar
- Place your feet at the end
- Then, try to do pull-ups with the added assistance from the band
Your Current Schedule Should Look Like This
As mentioned earlier, in step 2 of your 4-step pull-up progression routine, we'll be adding accessory exercises on top of these 3 variations. But here's a quick recap before we get into that. This is what your schedule should currently look like in step 1:
Session 1:
Kneeling Lat-Pulldown: 3 sets of 5 reps (heavy enough to slightly bring your knees off the ground)
Session 2:
Negative Pull-ups: 5 sets of 1 rep (as slow as possible)
Session 3:
Banded Pull-ups: 3 sets of 4-8 reps
Step 2: Strengthen Key Muscles
Now, it's time to add 4 accessory movements to your pull-up progression routine. These movements will help strengthen the various other muscles you'll need to improve your pull-up.
Exercise 1: Activated Hangs
The first movement is activated hangs. You'll add this accessory movement into all sessions of your pull-up progression routine. These will help with improving:
- Your grip strength AND
- The endurance of your back and core muscles
This is important because it takes about 20-30 seconds to complete a full set of 10 pull-ups.
Throughout this set, your back, core, and forearm muscles need to hold your body in a specific position to enable your larger muscles to pull your body up and down. You won’t be able to do a pull-up if these muscles don’t have the pre-requisite strength to do that.
So, this movement will focus on that weakness. We’ll implement this at the beginning of each of our 3 sessions. While we'll aim to hold it for about 10 seconds, you can just see how long you can get. We’ll work on building this time up in step 3.
To perform it:
- Start by hanging off a pull-up bar
- Flex your thighs, squeeze your glutes, point your toes forward, and engage your core
- From here, pull your shoulders down and away from your ears - and hold that position
Try to remain as stiff as possible As the seconds go by, you’ll start to feel a burn in your mid-back muscles, forearms, and core, as they work hard to hold that position.

Exercise 2: Australian Pull-Ups
The second movement, Australian pull-ups, will be added to session 1 of your routine.
Several of the members in my Built With Science programs have found this exercise to be very helpful in improving their pull-up strength. This is because it:
- Teaches your body how to control itself as you pull AND
- Will continue to strengthen the important core and core muscles used in the pull-up
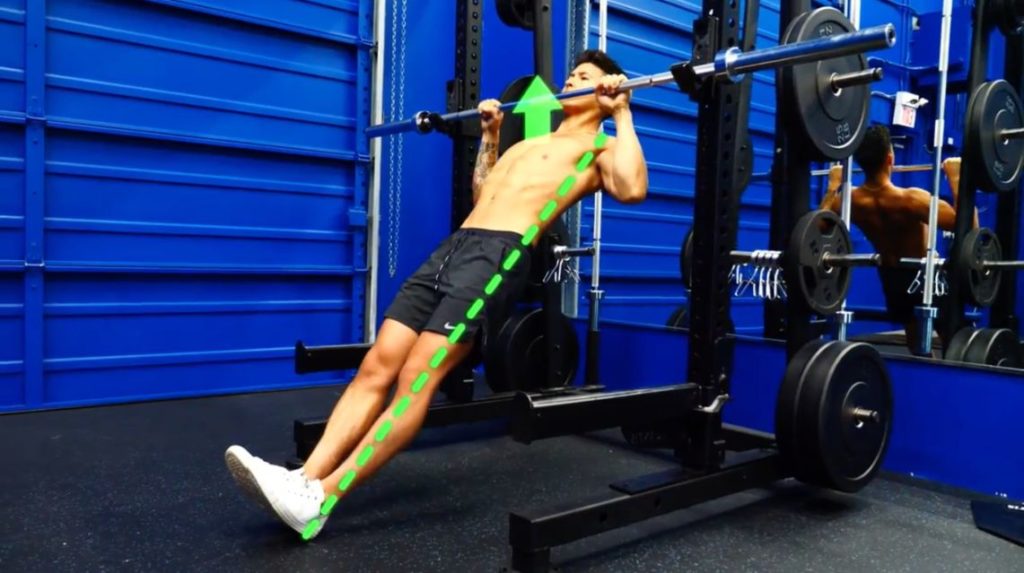
The Australian pull-up is actually very similar to a standard pull-up. The only difference? Your body will be in a horizontal position, rather than a vertical one. This makes the movement easier. You can perform the exercise by:
- Hanging off a high bar with your feet straight on the ground
- Straightening your arms
- And then pulling your chest towards the bar while keeping your body in a straight line
By the way: this applies to nearly every single exercise you want to master. There are certain accessory movements you could leverage to improve your strength/performance for the main lift. The only issue? Knowing what these movements are in the first place. Luckily for you, though, Built With Science programs do the work for you. To always know what the most relevant accessory movements are:
Click the button below to take my analysis quiz to discover the best program for you:
↓
Exercise 3 & 4: Lat Pull-Down & Close-Grip Underhand Pulldown
Given its seated position, the standard lat pulldown (vs. the standard pull-up) decreases core involvement. This is why many who can pull a lot of weight with this movement still struggle with doing a single pull-up.
But, remember that we’ve already filled this 'core gap' with our other exercises. Meaning? We can now strategically use 2 types of lat pulldowns to help add more overall pulling volume to your pull-up progression routine.
To minimize the risk of overworking the same muscles, though, we’ll use an overhand wide grip in one of our weekly sessions and an underhand close grip in the other session.

Your Weekly Schedule In Step 2 Should Look Like This
So with these 4 exercises added in, this is what your weekly schedule should now look like. In the next step, we’ll show you how to add more difficulty to these exercises so that your body continues to build the strength it needs to do a pull-up.
Session 1
Activated Hangs: 3 x 10s
Kneeling Pulldown: 3 x 5
Australian Pull-ups: 3 x 8-12
Session 2
Activated Hangs: 3 x 10s
Negative Pull-ups: 5 x 1
Overhand Lat-Pulldown: 3 x 8-12
Session 3
Activated Hangs: 3 x 10s
Banded Pull-ups: 3 x 4-8
Underhand Pulldown: 3 x 8-12
Step 3: Build The Strength
Now, let’s go through how to build your strength in each of the exercises in your routine.
Pull-Up Variations
Kneeling Lat-Pulldown
For the kneeling lat pull-down, you primarily want to focus on increasing the weight. However, the weight can’t get too heavy. For example, if you weigh 150lbs and the weight stack is 140lbs, you’ll be pulling yourself up until your feet are on the ground. Therefore, once you get to a point where your knees are well off the ground, simply try to do more reps rather than add more weight.
Negative Pull-ups
For the negative pull-ups, you’ll want to increase the time it takes you to descend from the top position every week. In week 1, you’ll start with 5 sets of a 1-second descent. But you should gradually work towards increasing this to 5 sets of a 5-second descent.
Banded Pull-ups
For your banded pull-ups, start with a band that allows you to do 3 sets of 4 reps. Continue using this band until you can do 3 sets of 8 reps. Once you can do that, drop to the next smaller band you have to make it more difficult. Only have one band? You can instead make the movement harder by taking one leg out of the band.
Accessory Movements
Australian Pull-Ups
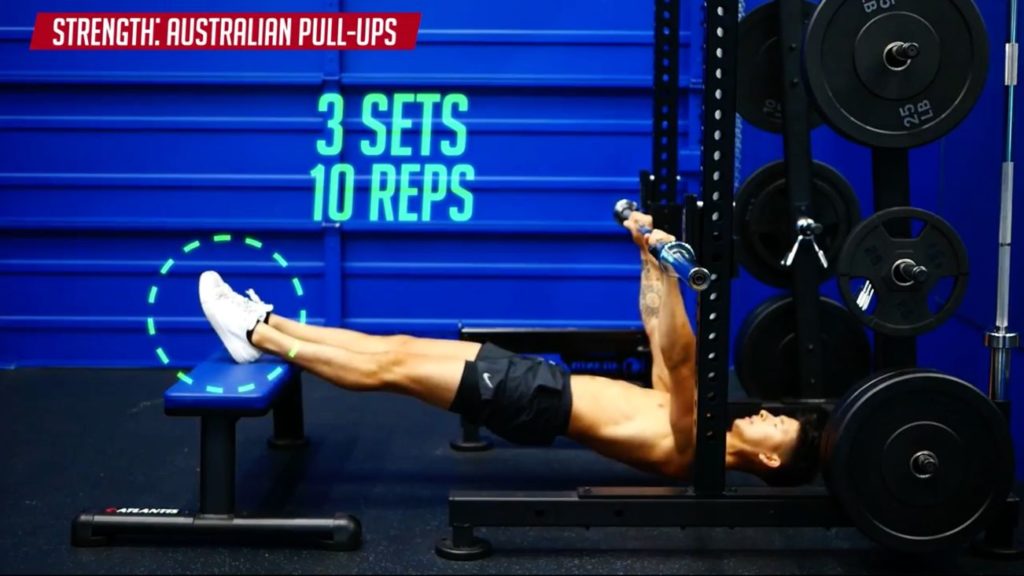
For your Australian pull-ups, you want to aim to do 3 sets of 10 reps. Once you can do that, you can make this harder by reducing the height of the bar. Once you’ve reached the point where your body is horizontal, you can continue increasing the difficulty by elevating your feet instead.
Active Scapular Holds
For your holds, simply attempt to increase the time you can hold. You don’t want to go to the point where you couldn’t hold on any longer if your life depended on it. But just try to add about 5-10 seconds to your time every week. A goal to aim for would be around 30 seconds.
Overhand & Close Grip Lat Pulldown
For the seated lat pulldowns, simply increase the weight every time you can successfully do 3 sets of 12 reps.
Congratulations! You have your strength plan set up. And now, it's time for the final step that'll get you to your first pull-up by using the chin-up.
Step 4: Start With Chin-Ups
First off, to use this routine for the best results, replace all of your current back training with these 3 weekly sessions. Do them consistently.
It would also be a good idea to reduce the number of sets you do by about 10-20% for your other upper body muscles (e.g., chest, shoulders, and triceps). This helps you focus on improving your pull-ups.
Then, after a week or two of this, before each of these 3 weekly sessions, start your session by attempting to do a chin-up. The chin-up is generally an easier exercise to master than the full pull-up. Once you can do a few chin-ups in a row, you’ll likely have the strength needed to master your first solid pull-up. And can build from there.
Before You Go
Within our Built With Science programs, we take care of all the guesswork in your routines by crafting a weekly program that caters to your specific body and fitness goals.
To find out which of our programs are best suited for you:
Click the button below to take my analysis quiz to discover the best program for you:
↓
For help on other exercises like your bench press or push-ups, you can click on the following articles:


